How to Create a ListView with Custom Cells and Navigation Bar in SwiftUI - A Step-by-Step Tutorial with Code in 2023
Article by: Manish Methani
Last Updated: September 20, 2021 at 8:04am IST
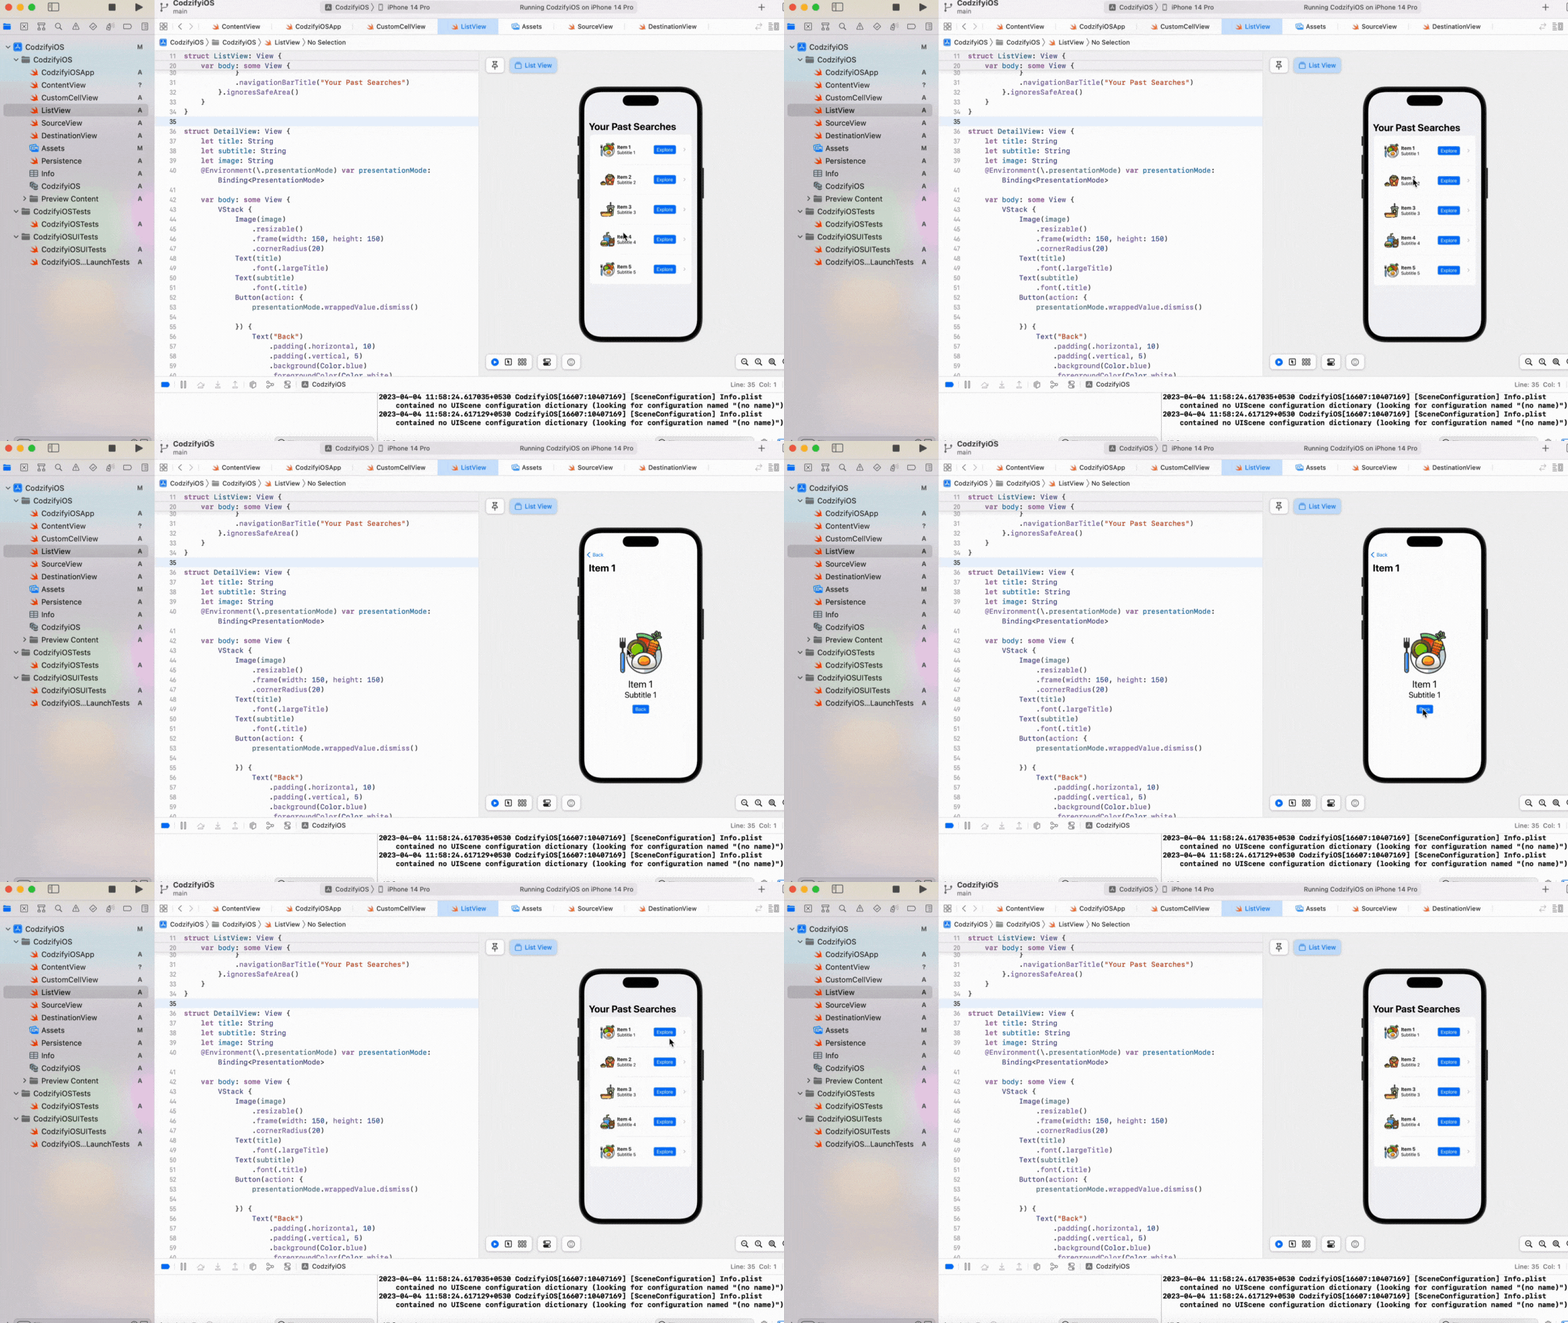
Final Output:

Introduction
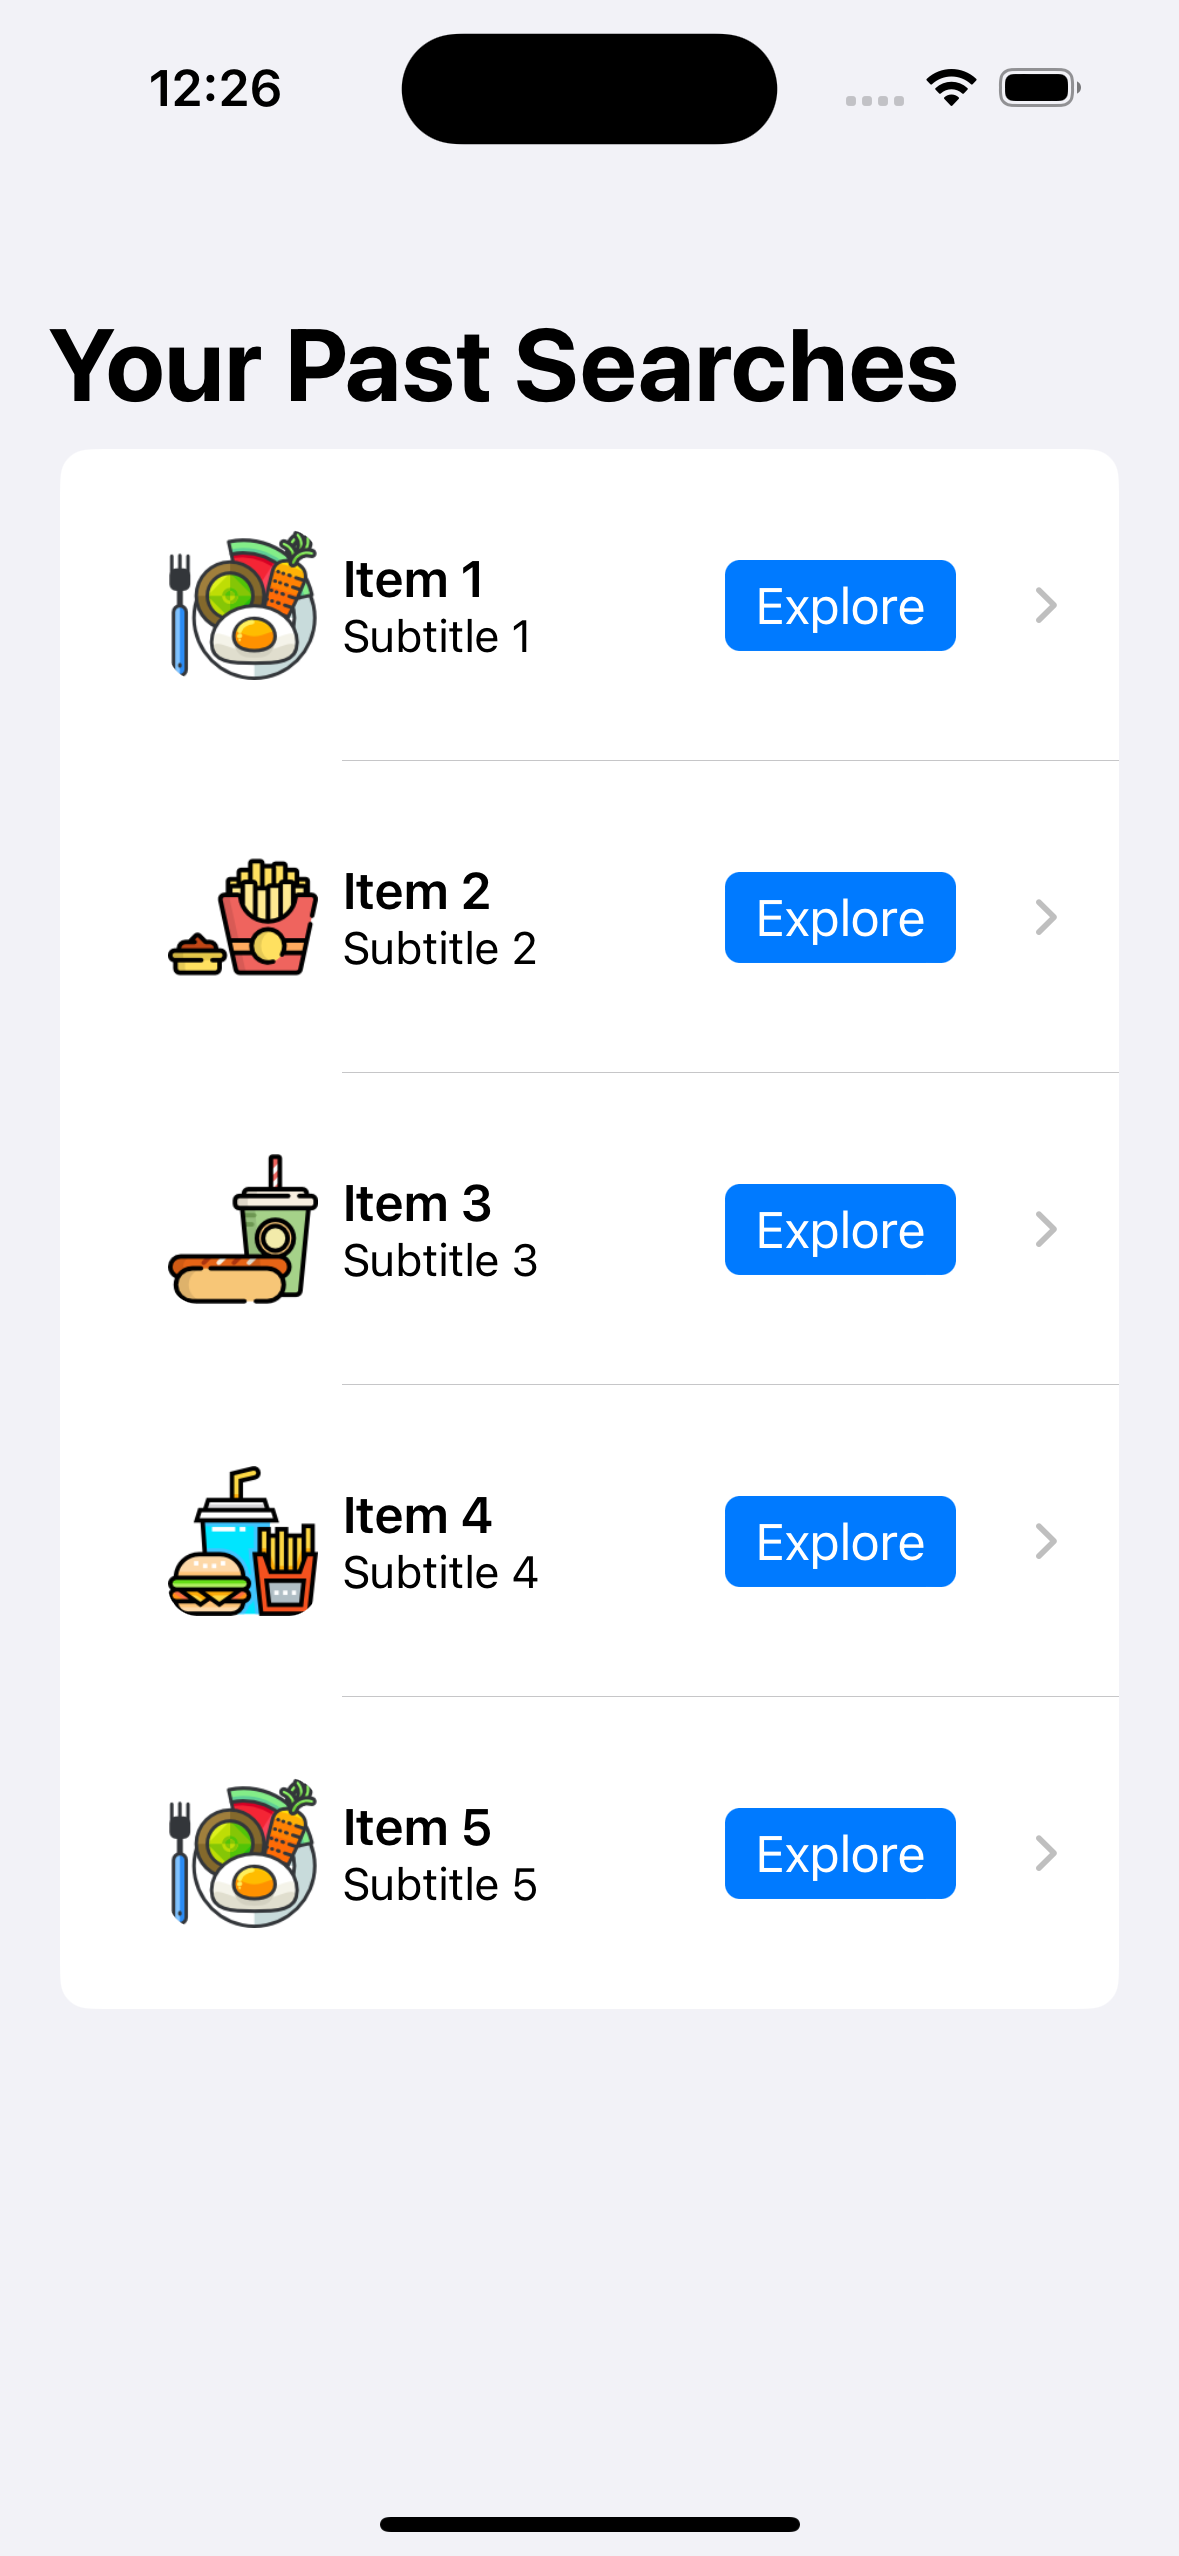
Creating a ListView with Custom Cells is a common task in iOS app development. Custom Cells give you more control over the look and feel of the list items, allowing you to create a more tailored user experience. In this tutorial, we will create a ListView with Custom Cells containing a title, subtitle, image, and button. The ListView will be wrapped inside a Navigation Bar to give users easy access to other parts of the app.
Prerequisites
This tutorial assumes you have a basic understanding of SwiftUI and Xcode. You should also have a development environment set up and running.
Step 1: Create a Custom Cell View
The first step is to create a Custom Cell View that will display the title, subtitle, image, and button.
struct CustomCellView: View {
    let title: String
    let subtitle: String
    let image: String
    let buttonAction: () -> Void

    var body: some View {
        HStack {
            Image(image)
                .resizable()
                .frame(width: 50, height: 50)
                .cornerRadius(10)
            VStack(alignment: .leading) {
                Text(title)
                    .font(.headline)
                Text(subtitle)
                    .font(.subheadline)
            }
            Spacer()
            Button(action: buttonAction) {
                Text("Explore")
                    .padding(.horizontal, 10)
                    .padding(.vertical, 5)
                    .background(Color.blue)
                    .foregroundColor(Color.white)
                    .cornerRadius(5)
            }
        }
        .padding()
    }
}
In this code, we define a CustomCellView that takes in a title, subtitle, and imageName. We then create a HStack containing an Image view, a VStack containing the title and subtitle text, a Spacer to push the button to the right, and finally, a Button with an action and label.
Step 2: Create a ListView
Next, we create a ListView that will display a list of Custom Cells.
struct ListView: View {
    let items = [
        (title: "Item 1", subtitle: "Subtitle 1", image: "image1"),
        (title: "Item 2", subtitle: "Subtitle 2", image: "image2"),
        (title: "Item 3", subtitle: "Subtitle 3", image: "image3"),
        (title: "Item 4", subtitle: "Subtitle 4", image: "image4"),
        (title: "Item 5", subtitle: "Subtitle 5", image: "image1")
    ]

    var body: some View {
        NavigationView {
            List {
                ForEach(items, id: .title) { item in
                    NavigationLink(destination: DetailView(title: item.title, subtitle: item.subtitle, image: item.image)) {
                        CustomCellView(title: item.title, subtitle: item.subtitle, image: item.image){
                            print("Button tapped for item: (item.title)")
                        }
                    }
                }
            }
            .navigationBarTitle("Your Past Searches")
        }.ignoresSafeArea()
    }
}
In this code, we define a ListView that contains a List. We then use a ForEach loop to loop through our items array and create a CustomCellView for each item. We wrap each `CustomCell View in a NavigationLink that links to a DetailView passing the title, subtitle, and imageName as parameters.

Step 3: Create a DetailView
The DetailView will display the details of a selected item.
struct DetailView: View {
    let title: String
    let subtitle: String
    let image: String
    @Environment(.presentationMode) var presentationMode: Binding

    var body: some View {
        VStack {
            Image(image)
                .resizable()
                .frame(width: 150, height: 150)
                .cornerRadius(20)
            Text(title)
                .font(.largeTitle)
            Text(subtitle)
                .font(.title)
            Button(action: {
                presentationMode.wrappedValue.dismiss()

            }) {
                Text("Back")
                    .padding(.horizontal, 10)
                    .padding(.vertical, 5)
                    .background(Color.blue)
                    .foregroundColor(Color.white)
                    .cornerRadius(5)
            }

        }
        .padding()
    }
}
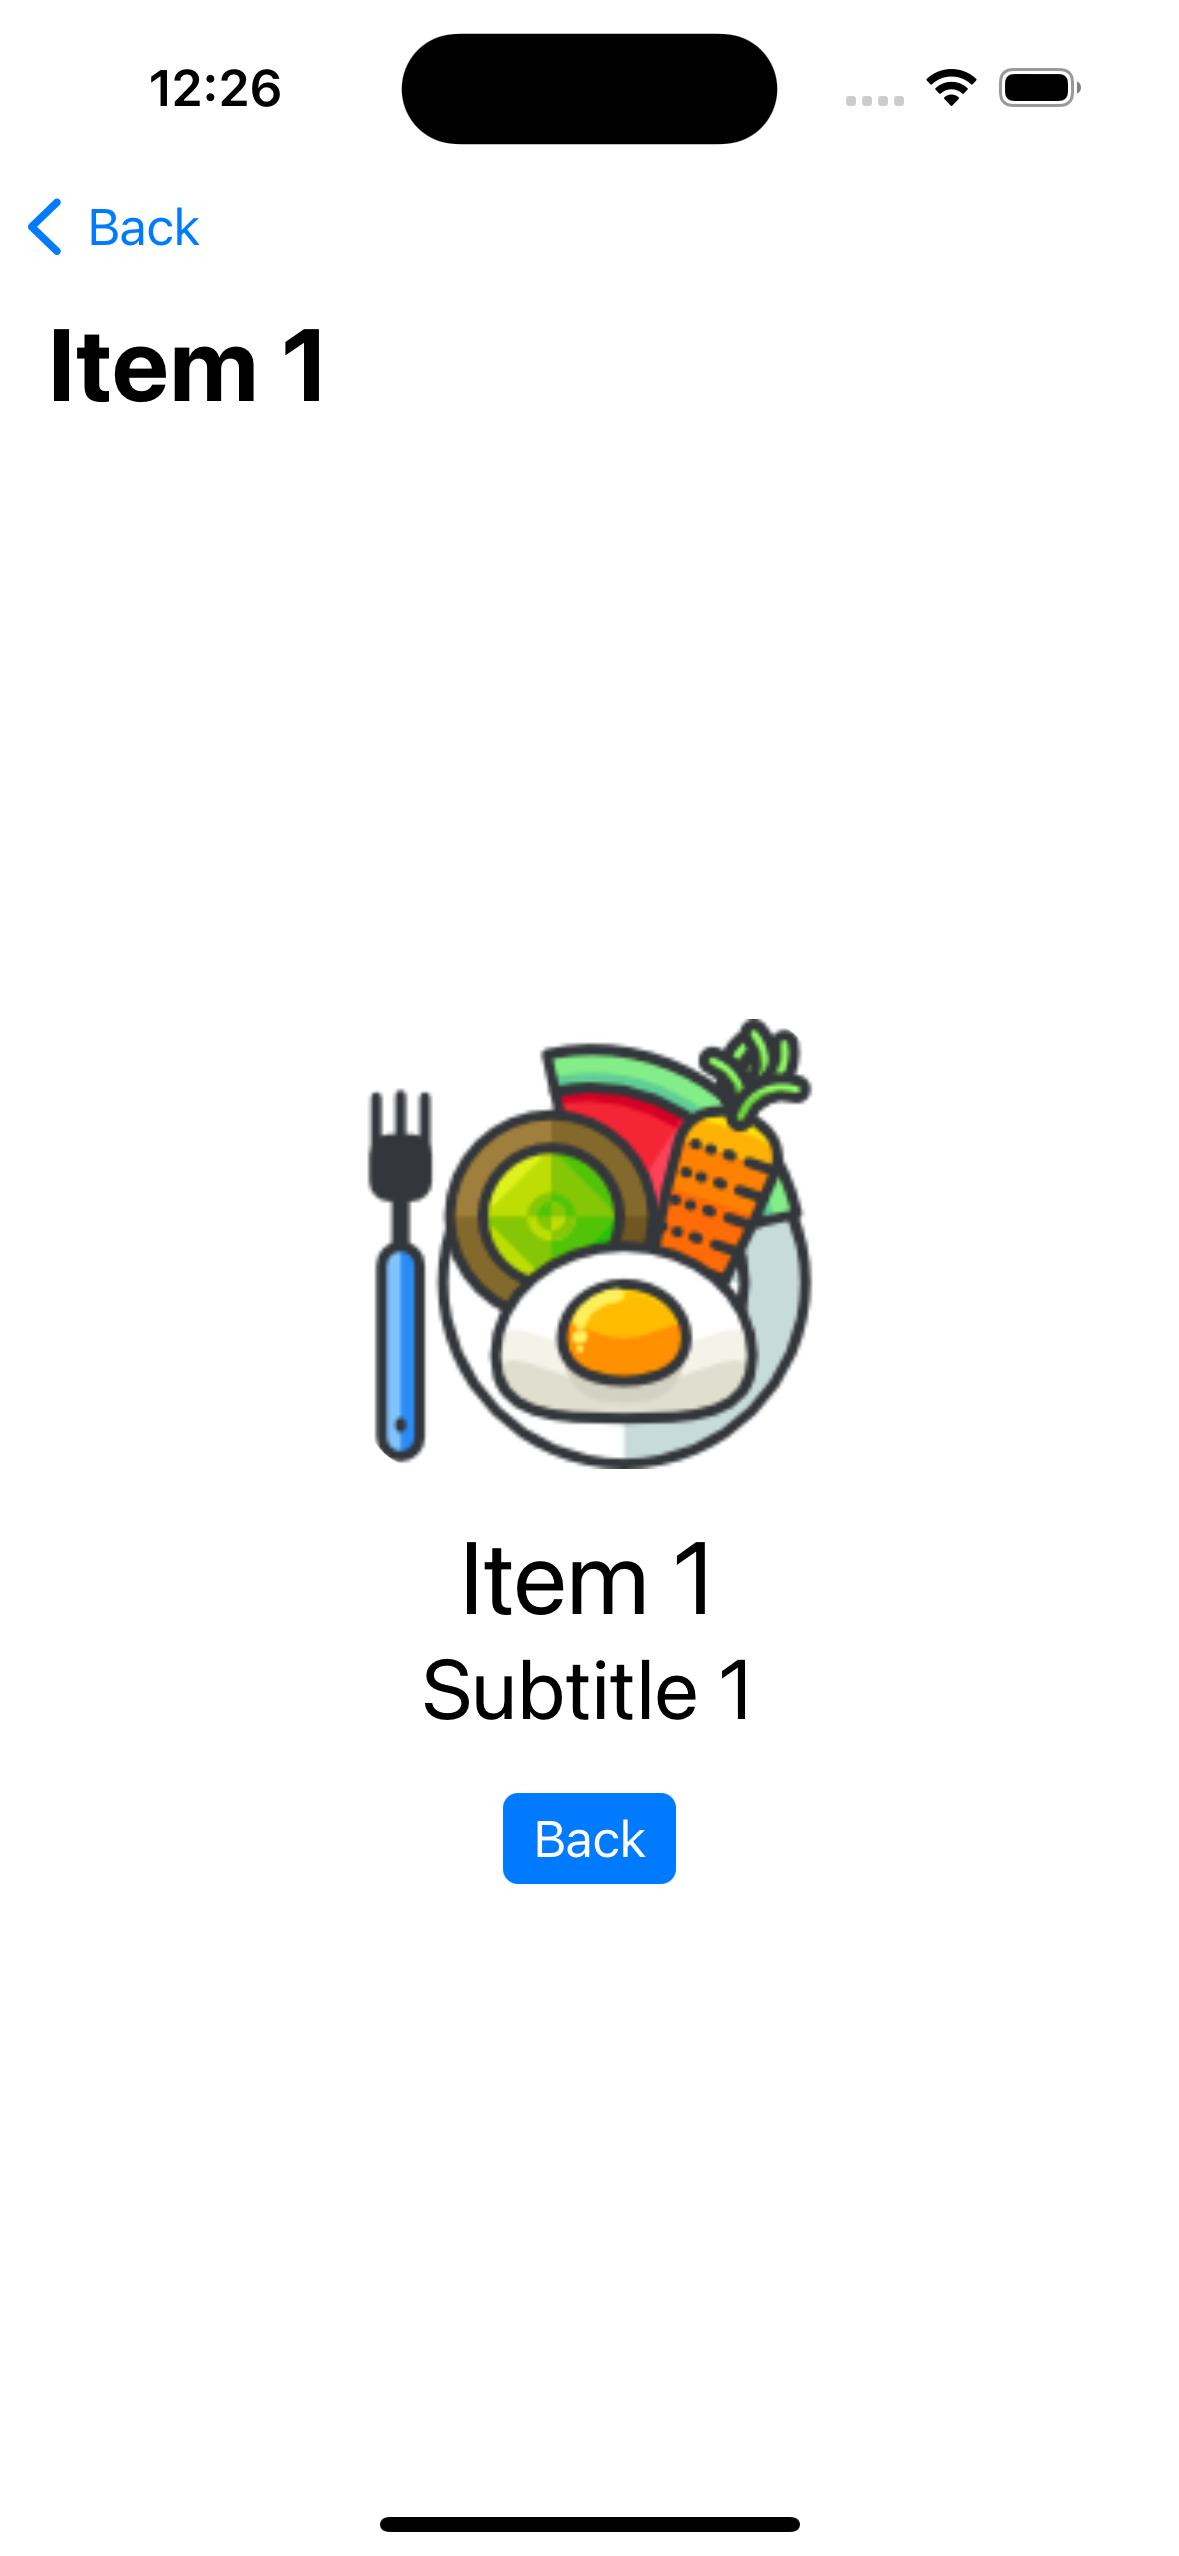
In this code, we define a DetailView that takes in the title, subtitle, and imageName. We then create a VStack containing an Image view, a Text view for the title, a Text view for the subtitle, and a back button to push the view back to previous screen.

Step 4: Add Navigation Links to ListView
To link our ListView to our DetailView, we need to wrap our ListView in a NavigationView.
struct ContentView: View {
    var body: some View {
        NavigationView {
            ListView()
                .navigationTitle("List View")
        }
    }
}
In this code, we define a ContentView that contains a NavigationView wrapping our ListView. We also set the navigation bar title to "List View".
Step 5: Add a Navigation Bar Title
Finally, we can add a navigation bar title to our DetailView.
struct DetailView: View {
    let title: String
    let subtitle: String
    let image: String
    @Environment(.presentationMode) var presentationMode: Binding

    var body: some View {
        VStack {
            Image(image)
                .resizable()
                .frame(width: 150, height: 150)
                .cornerRadius(20)
            Text(title)
                .font(.largeTitle)
            Text(subtitle)
                .font(.title)
            Button(action: {
                presentationMode.wrappedValue.dismiss()

            }) {
                Text("Back")
                    .padding(.horizontal, 10)
                    .padding(.vertical, 5)
                    .background(Color.blue)
                    .foregroundColor(Color.white)
                    .cornerRadius(5)
            }

        }
        .padding().navigationTitle(title)
    }
}
In this code, we add a .navigationTitle modifier to our VStack to set the navigation bar title to the title of the item.
Final Output:

Frequently Asked Questions
Q: Can I use a different type of list view instead of List?
A: Yes, you can use other types of lists, such as ScrollView or LazyVStack.
Q: Can I customize the navigation bar further?
A: Yes, you can customize the navigation bar by adding modifiers such as .navigationBarColor, .navigationBarTitleDisplayMode, or .navigationBarItems.
Conclusion
In this tutorial, we created a ListView with Custom Cells containing a title, subtitle, image, and button. The ListView was wrapped inside a Navigation Bar to give users easy access to other parts of the app. We also created a DetailView to display the details of a selected item. By following the steps outlined in this tutorial, you can create your own ListView with Custom Cells and Navigation Bar in SwiftUI.
