How to Implement Firebase Google Sign In and Phone Number Authentication in Angular in 2023
Article by: Manish Methani
Last Updated: September 23, 2021 at 10:04am IST
Firebase provides several authentication options, including Google Sign-In and Phone Number Authentication. In this tutorial, we will show you how to implement both of these authentication methods in an Angular application using Firebase.
Prerequisites:
- Node.js and npm installed on your machine
- Angular CLI installed
- A Firebase account with a project set up
You can refer the video of this topic in case you get any doubts. Make sure to subscribe the channel and press the bell icon for latest updates on posts like this.
Step 1: Create a new Angular project by running the following command in your terminal:
ng new my-firebase-app
Navigate into the project directory by running:
cd my-firebase-app
Step 2: Install Firebase dependencies Install the Firebase dependencies by running the following command:
npm install firebase @angular/fire --save
This will install Firebase and AngularFire, which is an Angular library for Firebase.
Step 3: Create a Firebase project and configure Firebase in your Angular app
- Go to the Firebase Console and create a new project.
- Click on "Add app" and select "Web".
- Register your app by entering a name and clicking on "Register app".
- Copy the Firebase configuration object that appears and add it to your Angular environment file. You can create a new environment file by running:
ng g c environments/environment
In the environment file, add the following code:
export const environment = {
    production: false,
    firebase: {
      apiKey: "YOUR_API_KEY",
      authDomain: "YOUR_AUTH_DOMAIN",
      databaseURL: "YOUR_DATABASE_URL",
      projected: "YOUR_PROJECT_ID",
      storageBucket: "YOUR_STORAGE_BUCKET",
      messagingSenderId: "YOUR_MESSAGING_SENDER_ID",
      appId: "YOUR_APP_ID"
    }
  };
Replace the placeholder values with the values from your Firebase configuration object.
5. Import the environment file in your Angular app.module.ts file and initialize Firebase:
    import { NgModule } from "@angular/core";
    import {AngularFireModule} from "@angular/fire/compat";
    import { AngularFireAuthModule } from "@angular/fire/compat/auth";
    import { SignINComponent } from "./sign-in/sign-in.component";
    import { environments } from "./environments/environment";
    @NgModule({
      declarations: [
        AppComponent,
        SignINComponent,
       ],
    @NgModule({
      imports: [
        AngularFireAuthModule,
        AngularFireModule.initializeApp(environments),
        provideFirebaseApp(() => initializeApp(environments)),

        provideFirestore(() => getFirestore()),  ]
    })
    export class AppModule { }
Step 4: Implement Google Sign-In authentication
- Go to the Firebase Console and enable Google Sign-In in the Authentication tab.
- In your Angular component where you want to implement Google Sign In, import the AngularFireAuth module:
Lets create sign-in component using this command
ng g component sign-in
Add a sign-in component to your app-routing.module.ts file
The complete Code of the app-routing.module.ts file is here.
import { NgModule } from "@angular/core";
import { RouterModule, Routes } from "@angular/router";
import { SignINComponent } from "./sign-in/sign-in.component";

const routes: Routes = [
{ path: "", redirectTo: "sign-in", pathMatch: "full"},
{ path: "sign-in", component: SignINComponent  },
]

@NgModule({
  imports: [RouterModule.forRoot(routes)],
  exports: [RouterModule]
})
export class AppRoutingModule { }
Now we are done with the installation and initialization part of the modules. Its time to create the UI in sign-in component where we will provide the users a way to Sign in with Google or sign in using Phone number Authentication. The complete code of sign-in component is here,
Before referring to the code, make sure you have created an AuthService using this command.
ng g s AuthService
In this service file, we have implemented all the Authentication methods which we will use in our sign-in component.
Code of auth.service.ts file is
import { Injectable } from "@angular/core";
import { GoogleAuthProvider,signOut,getAuth } from "firebase/auth";
import { AngularFireAuth } from "@angular/fire/compat/auth";
import { Router } from "@angular/router";

@Injectable({
  providedIn: "root",
})
export class AuthService {
  constructor(public router: Router,
    public afAuth: AngularFireAuth // Inject Firebase auth service
  ) {}
  // Sign in with Google
  GoogleAuth() {
    return this.AuthLogin(new GoogleAuthProvider());
  }
  // Auth logic to run auth providers
  AuthLogin(provider:any) {
    return this.afAuth
      .signInWithPopup(provider)
      .then((result) => {

        //Sessions
        let JsonData = {
          name: result.user?.displayName,
          email: result.user?.email
        }

        localStorage.setItem("data", JSON.stringify(JsonData));

        this.router.navigate(["dashboard"]);
        console.log("You have been successfully logged in!" + result.user?.displayName);
      })
      .catch((error) => {
        console.log(error);
      });
  }

  signOut()
  {
    const auth = getAuth();
    localStorage.clear();
    signOut(auth).then(() => {
      // Sign-out successful.
      this.router.navigate(["login"]);

    }).catch((error) => {
      // An error happened.
    });
  }
}
Â
Code of sign-in.component.ts file is
import { Component, Injectable, NgZone, OnInit } from "@angular/core";
import { AuthService } from "../shared/auth.service";
import { getAuth, signInWithPhoneNumber, RecaptchaVerifier } from "firebase/auth";
import { WindowService } from "../window.service";
import {FormBuilder, Validators} from "@angular/forms";
import { Router } from "@angular/router";

@Component({
selector: "app-sign-in",
templateUrl: "./sign-in.component.html",
styleUrls: ["./sign-in.component.css"]
})

export class SignINComponent {
mobileNumberString:string = "";
verifyOtpString:string = "";
winRef:any;

constructor(public authService: AuthService, windowRef: WindowService, private _formBuilder: FormBuilder, private router: Router) {
this.winRef = windowRef;
}

sendLoginOtp()
{
const auth = getAuth();
this.winRef.recaptchaVerifier = new RecaptchaVerifier("recaptcha-container", {
"size": "invisible",
}, auth);

const appVerifier = this.winRef.recaptchaVerifier;

signInWithPhoneNumber(auth, this.mobileNumberString,appVerifier)
.then((confirmationResult) => {

// SMS sent. Prompt user to type the code from the message, then sign the

// user in with confirmationResult.confirm(code).

this.winRef.confirmationResult = confirmationResult;
(document.getElementById("otpField") as HTMLElement).style.display = "inline-block";

(document.getElementById("verifyBtn") as HTMLElement).style.display = "inline-block";

}).catch((error) => {

// Error; SMS not sent
// ...
});
}

verifyOtp()
{
this.winRef.confirmationResult.confirm(this.verifyOtpString).then((result:any) => {

// User signed in successfully.
const user = result.user;
this.router.navigate(["dashboard"]);
// ...
}).catch((error:any) => {

// User could not sign in (bad verification code?)
// ...
});
}
}
Code of sign-in.component.html file is here,
<div style="background: #FFDF58; height:100vh;"> <div class="container bg-white text-center" style="border-radius:12px;position:absolute;top:60px;left:10%;padding:20px;"> <div class="row"> <div class="col-lg-12"> <img src="../../assets/codzfy_logo.png" width="60" style="padding-top: 20px;;"><br/><br/> <h1 style="font-size: 44px;;"><b>Codzify GenZ School</b></h1> <button style="background-color: transparent;border:none; " (click) = "authService.GoogleAuth()"> <img src="../../assets/btn_google_signin_light_normal_web@2x.png" style="width: 60%;" > </button> <p>or</p> <div id="recaptcha-container"></div> <mat-form-field appearance="outline"> <mat-label>Mobile Number</mat-label> <input matInput placeholder="Mobile Number" [(ngModel)]="mobileNumberString" required> </mat-form-field> <br/> <mat-form-field appearance="outline" id="otpField" > <mat-label>Enter OTP</mat-label> <input matInput placeholder="Enter OTP" [(ngModel)]="verifyOtpString" required> </mat-form-field> <br/> <button class="btn btn-primary" (click) ="sendLoginOtp()">Send OTP</button> <button class="btn btn-primary" id="verifyBtn" (click) ="verifyOtp()">Verify OTP</button> </div> </div> </div> </div>
Code of sign-component.css file is
#verifyBtn
{
display: none;
}

#otpField
{
display: none;
}
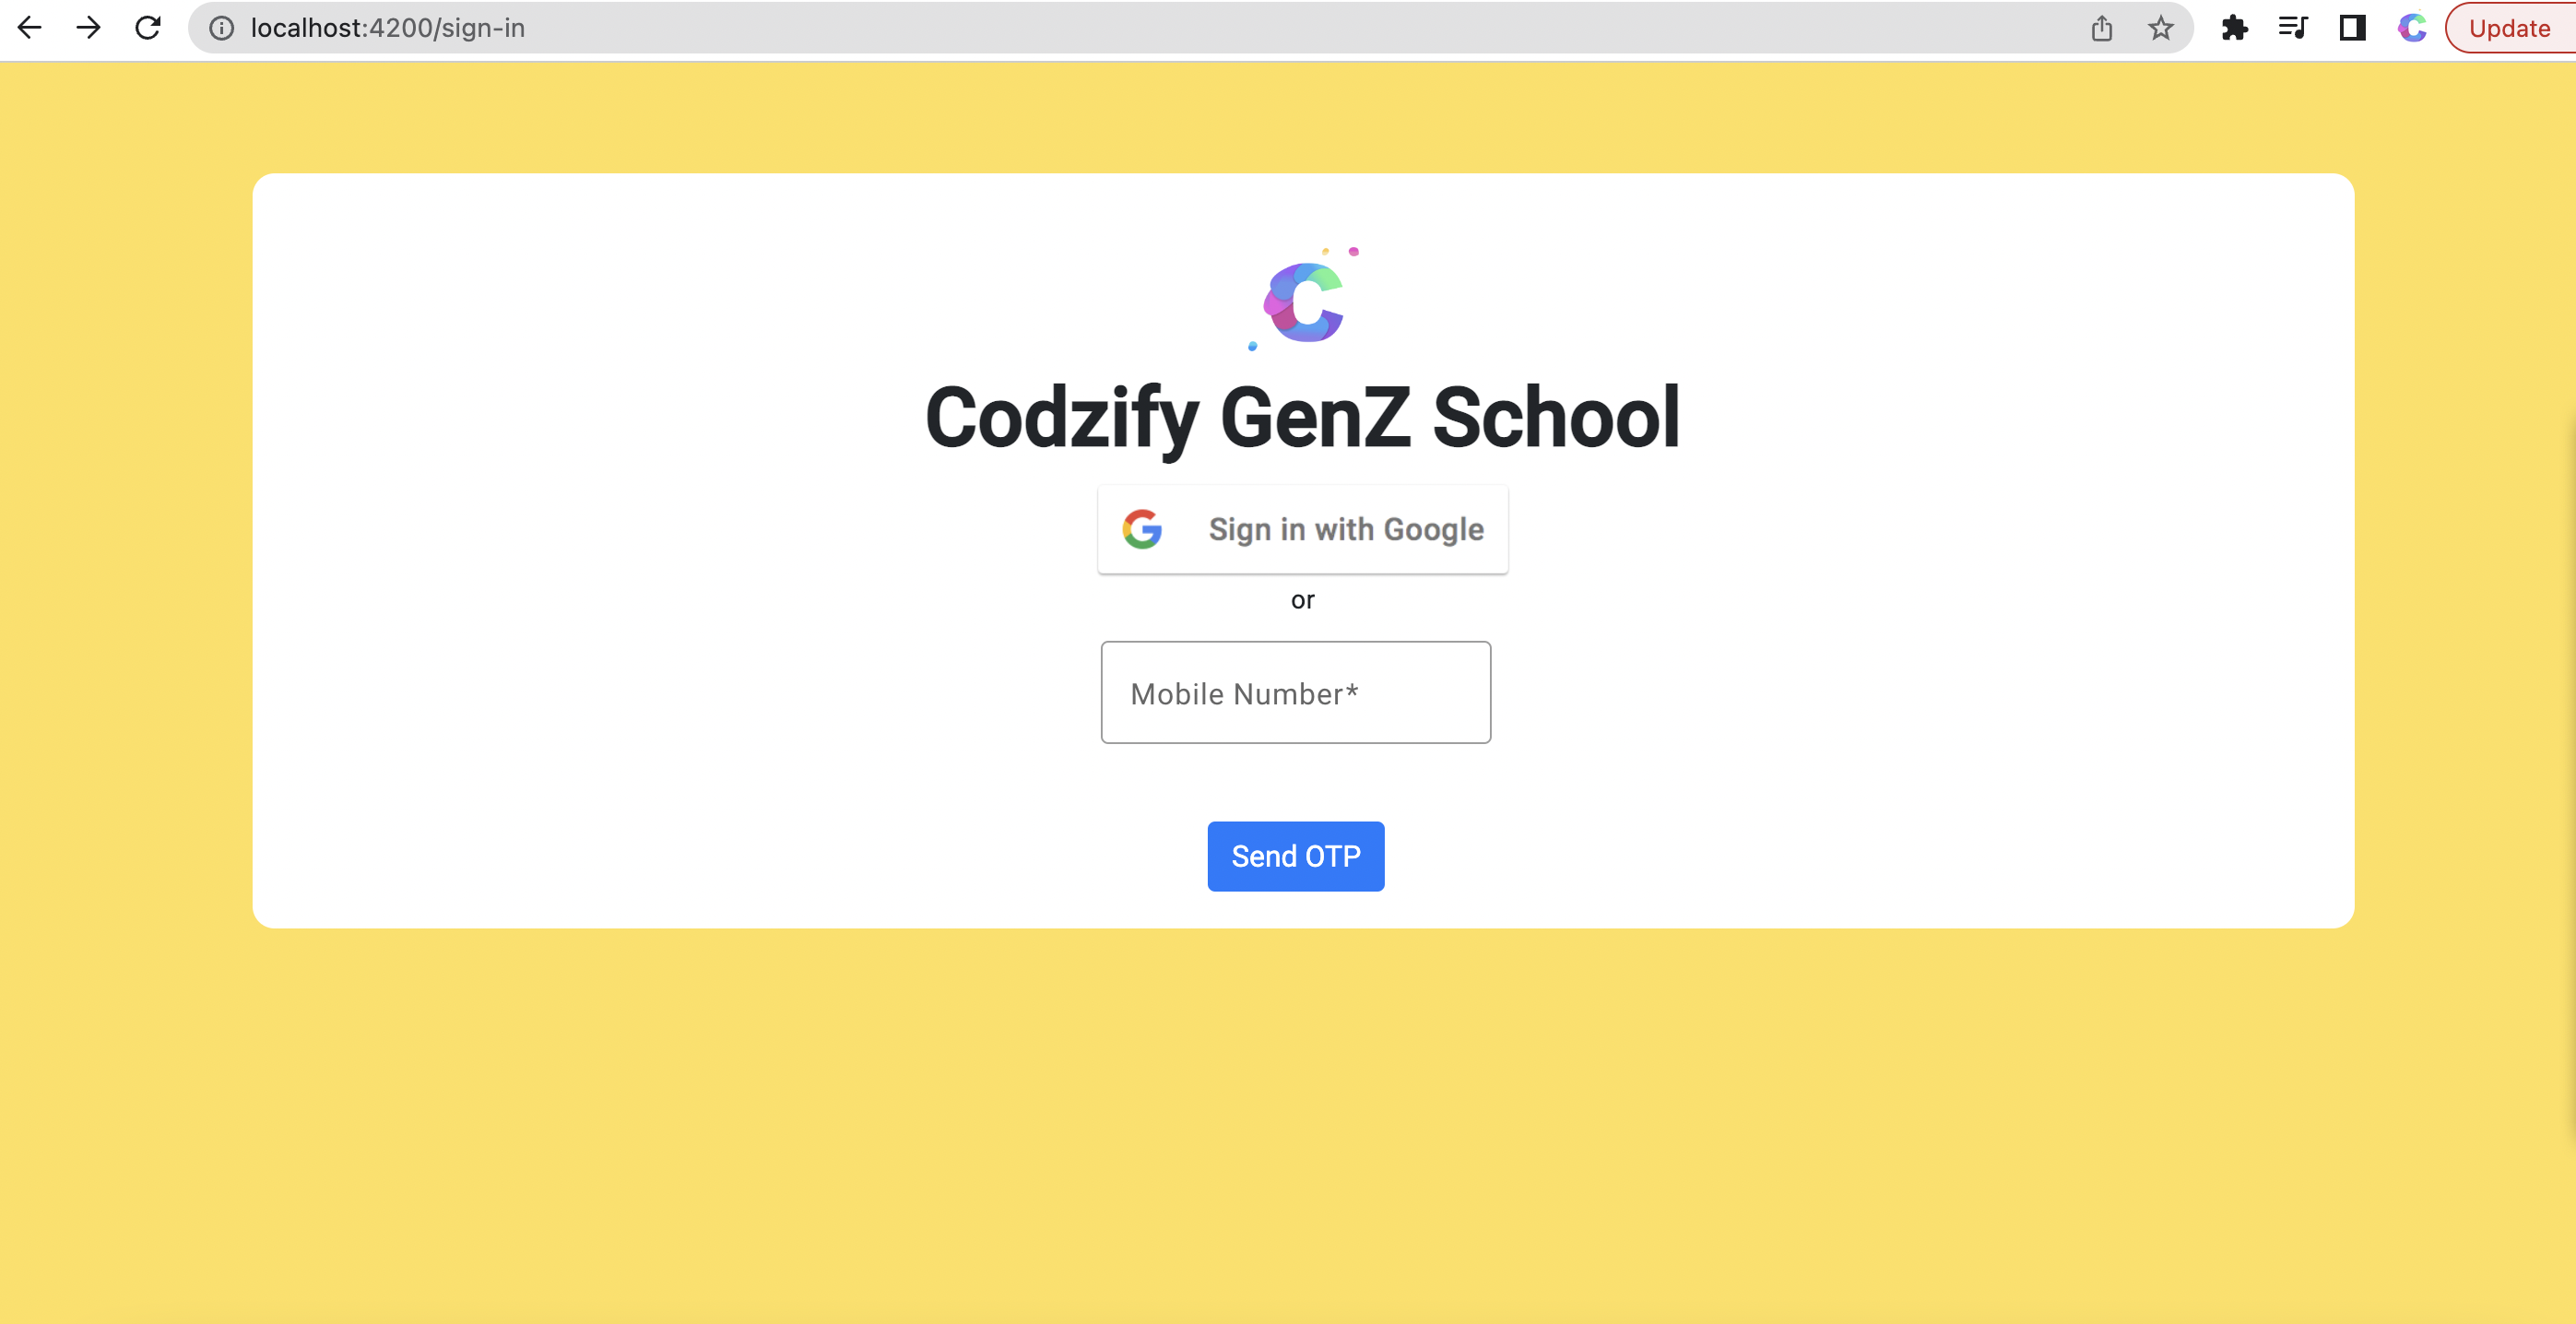
Final Output is

I hope you got a solid understanding of how to implement Google Sign-in and Phone Number Authentication in Angular.
You can refer the video of this in case you get any doubts.

