Learn How to Navigate to Another View in SwiftUI 2023 - Codzify.com
Article by: Manish Methani
Last Updated: September 20, 2021 at 10:04am IST

If you're building an app with SwiftUI, you'll likely need to navigate to another view at some point. In this tutorial, we'll cover the basics of how to navigate to another view in SwiftUI, including creating a destination view, triggering the navigation, and passing data between views.
Final Output:

Creating a Destination View
The first step in navigating to another view in SwiftUI is to create a destination view. This is the view that you want to navigate to when the user taps on a button or some other user interface element.
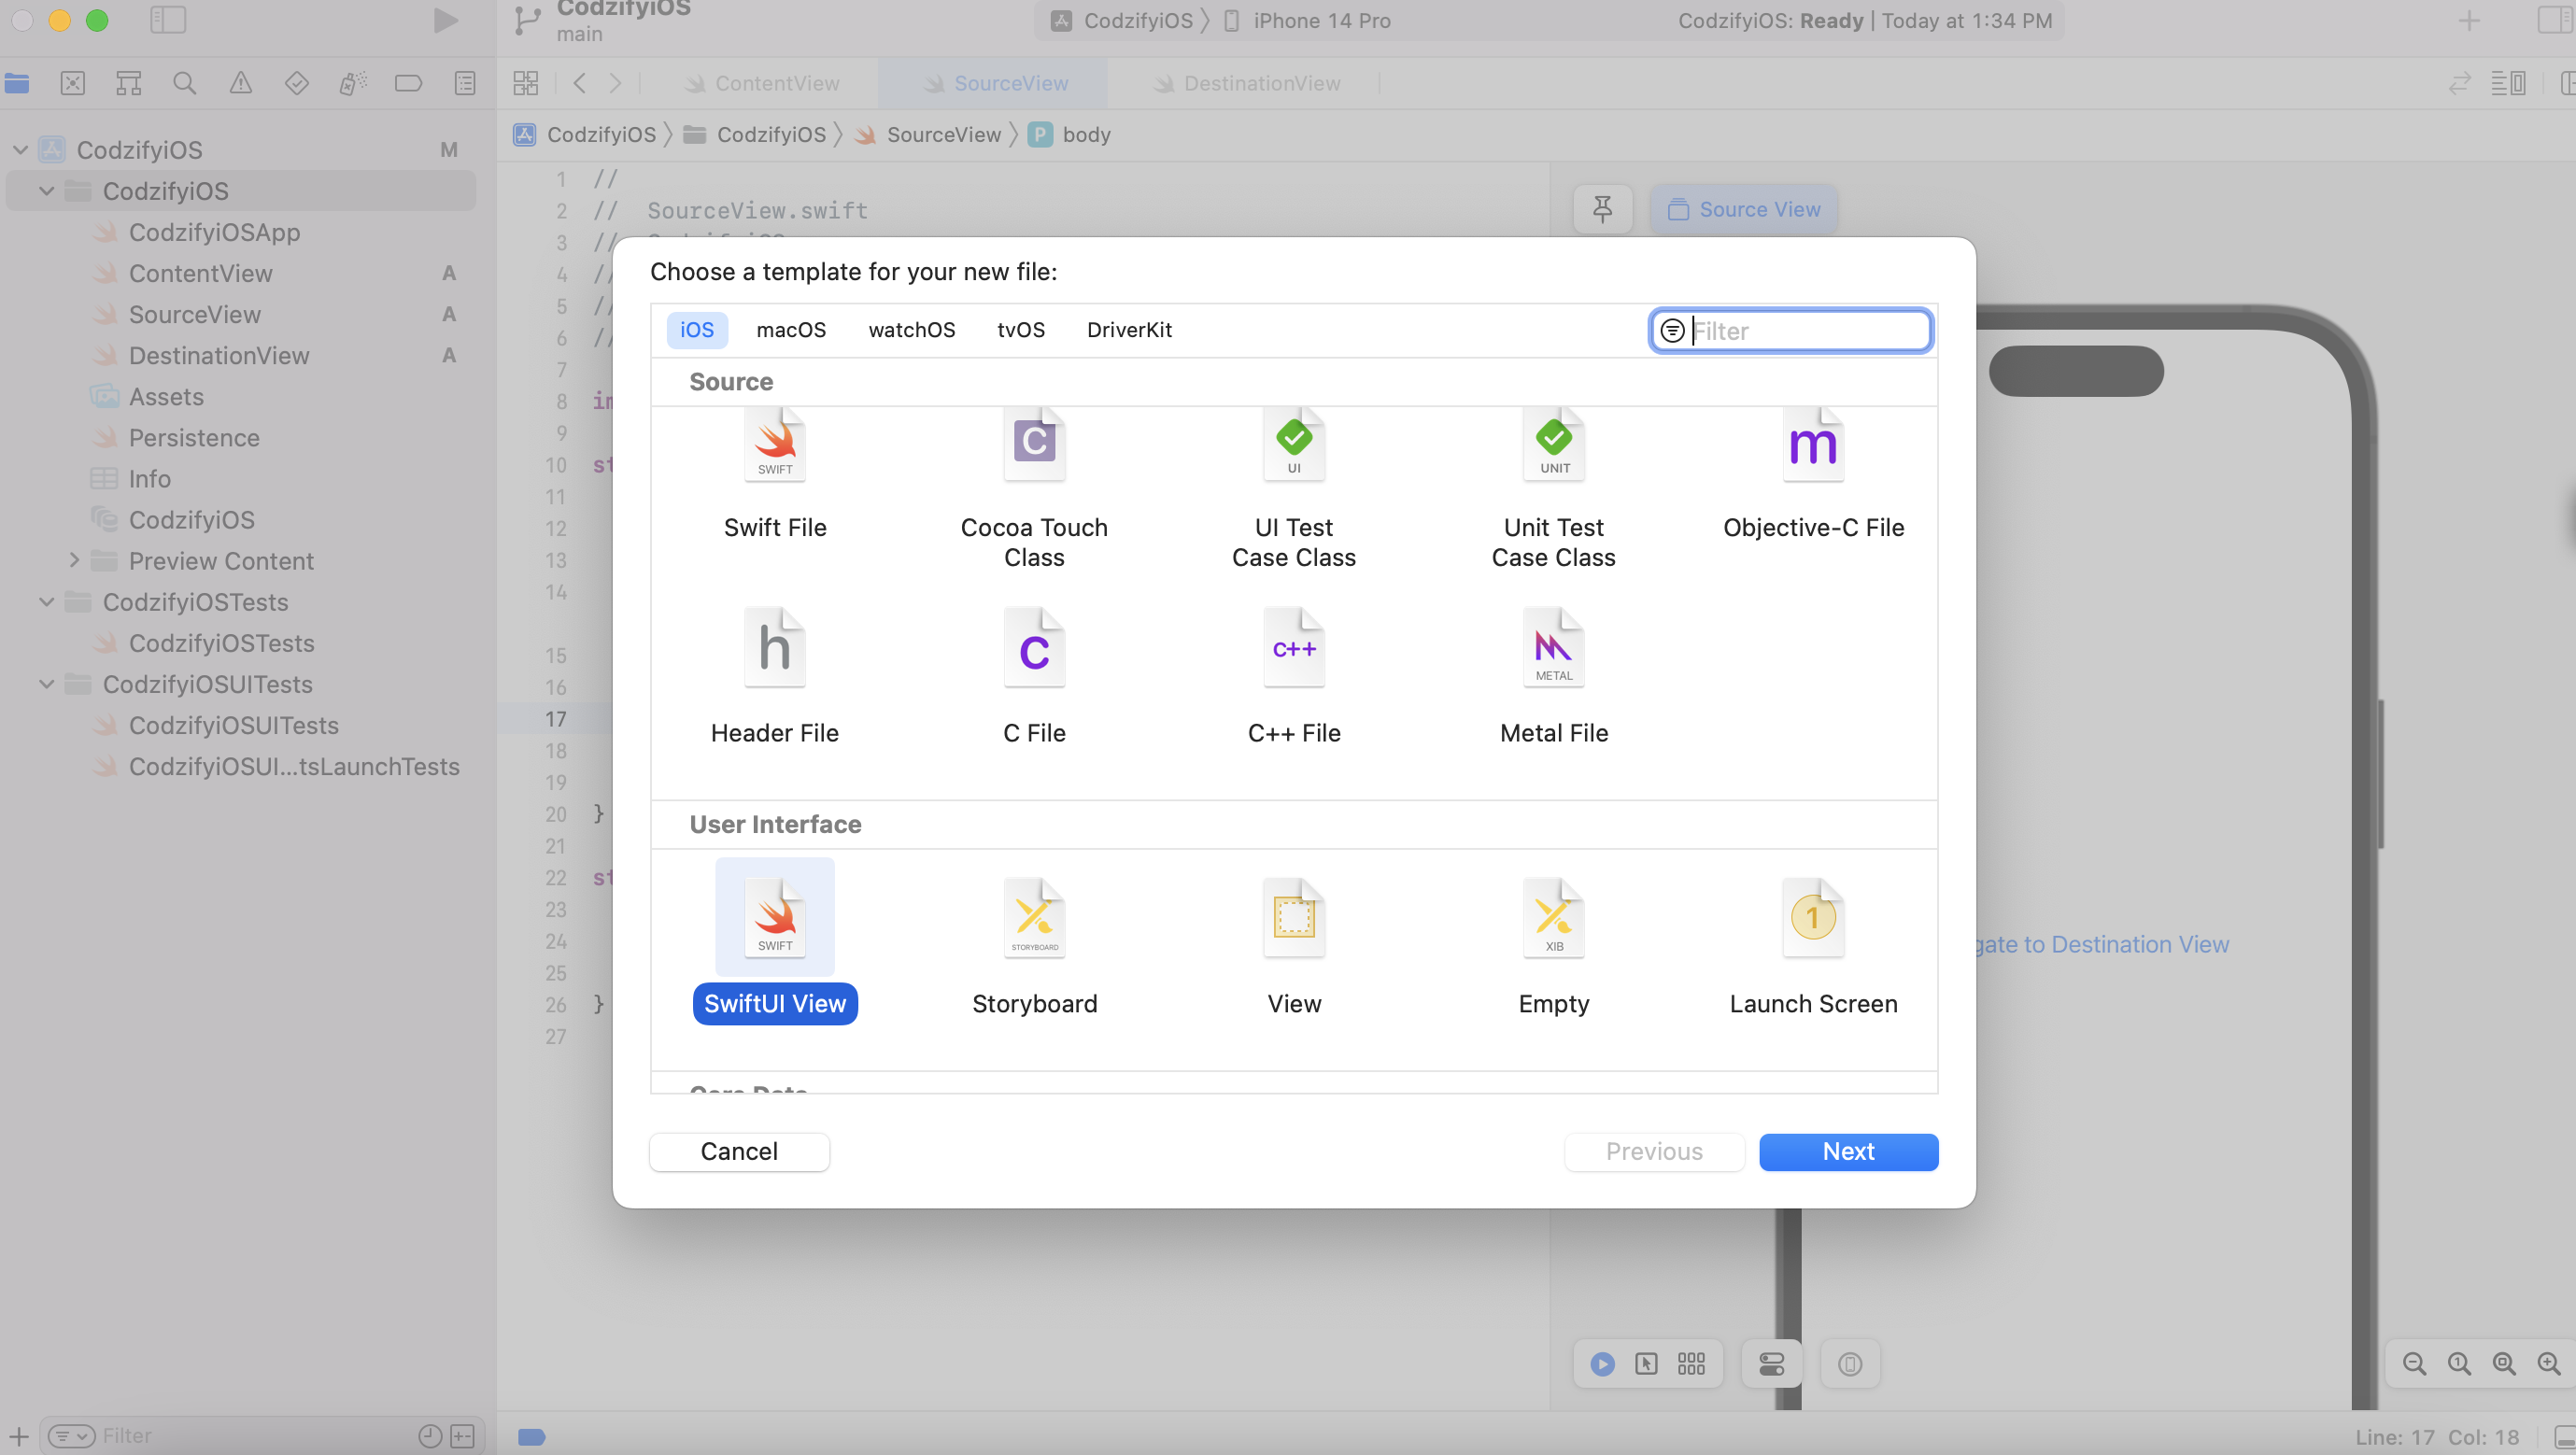
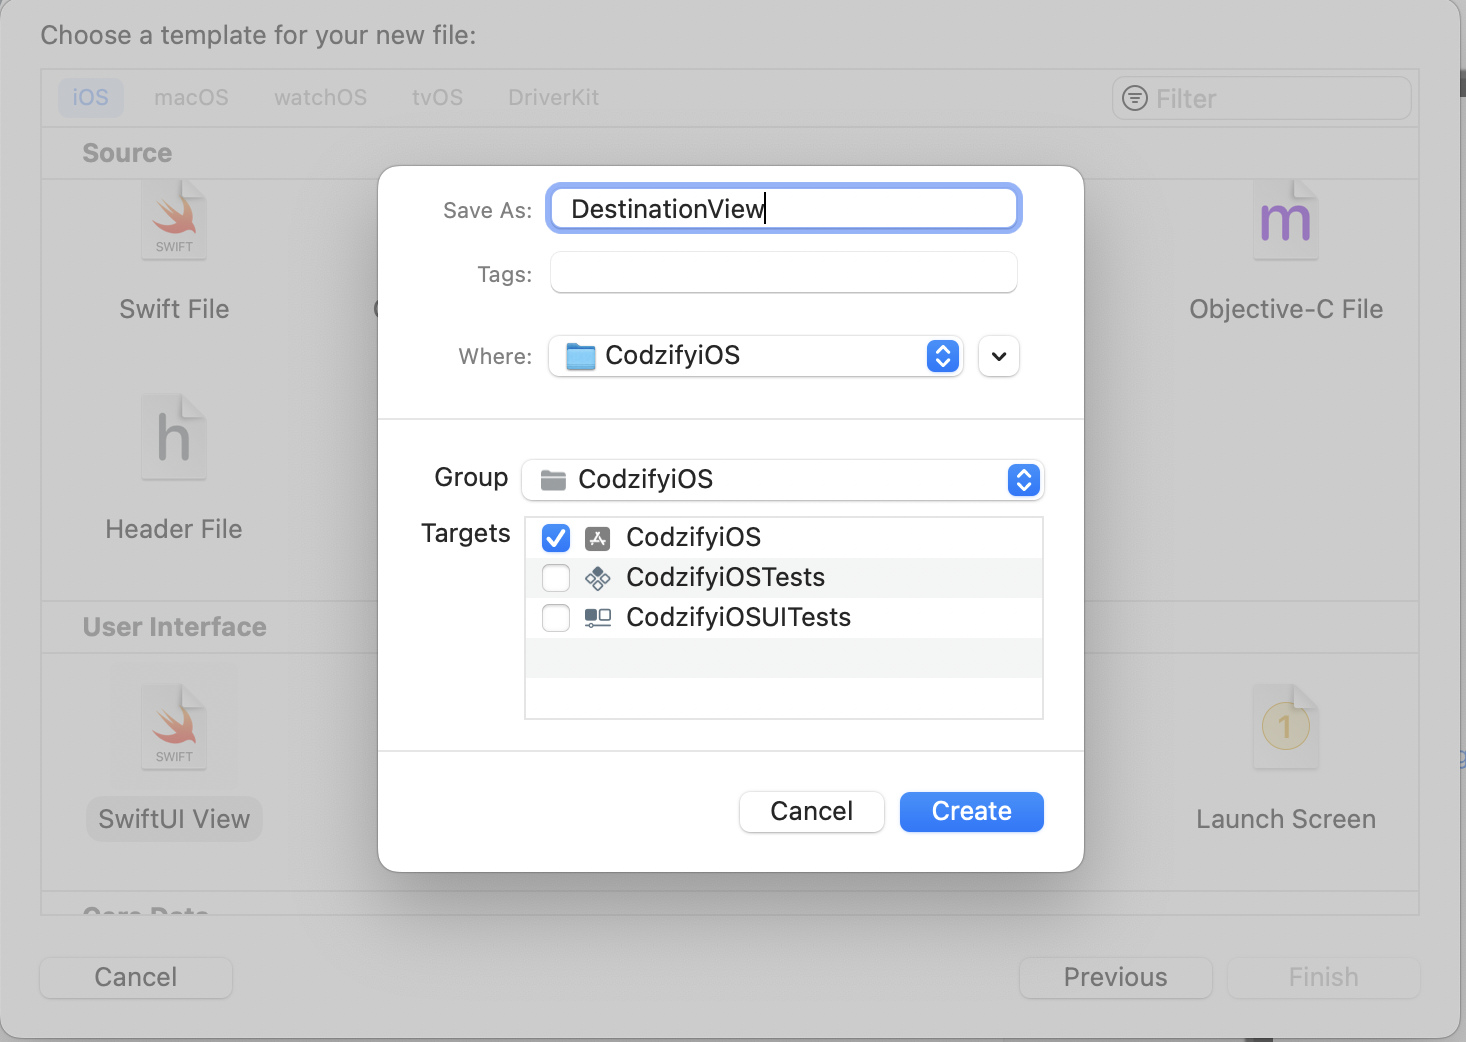
To create a DestinationView right click on your project title >> New File >> Select iOS template for your new file >> SwiftUI inside user Interfce section >> Save As DestinationView >> Create


Here's an example of a simple destination view:
struct DestinationView: View {
    var body: some View {
        Text("This is the destination view!")
    }
}
2. Triggering Navigation
Once you have your destination view, you'll need to trigger the navigation from your source view. This is typically done by wrapping your user interface element in a NavigationLink view.
Here's an example of a NavigationLink view that triggers navigation to our destination view:
struct SourceView: View {
    var body: some View {
        NavigationView {
            VStack {
                NavigationLink(destination: DestinationView()) {
                    Text("Navigate to Destination View")
                }
            }
        }
    }
}
Complete Code Reference of SourceView & DestinationView
Code of Destination View is given below,
import SwiftUI

    struct DestinationView: View {
        var body: some View {
            Text("Hello, World!")
        }
    }

    struct DestinationView_Previews: PreviewProvider {
        static var previews: some View {
            DestinationView()
        }
    }
Code of Source View is given below,
import SwiftUI

    struct SourceView: View {
        var body: some View {
                NavigationView {
                    VStack {
                        NavigationLink(destination: DestinationView()) {
                            Text("Navigate to Destination View")
                        }
                    }
                }
            }
    }

    struct SourceView_Previews: PreviewProvider {
        static var previews: some View {
            SourceView()
        }
    }
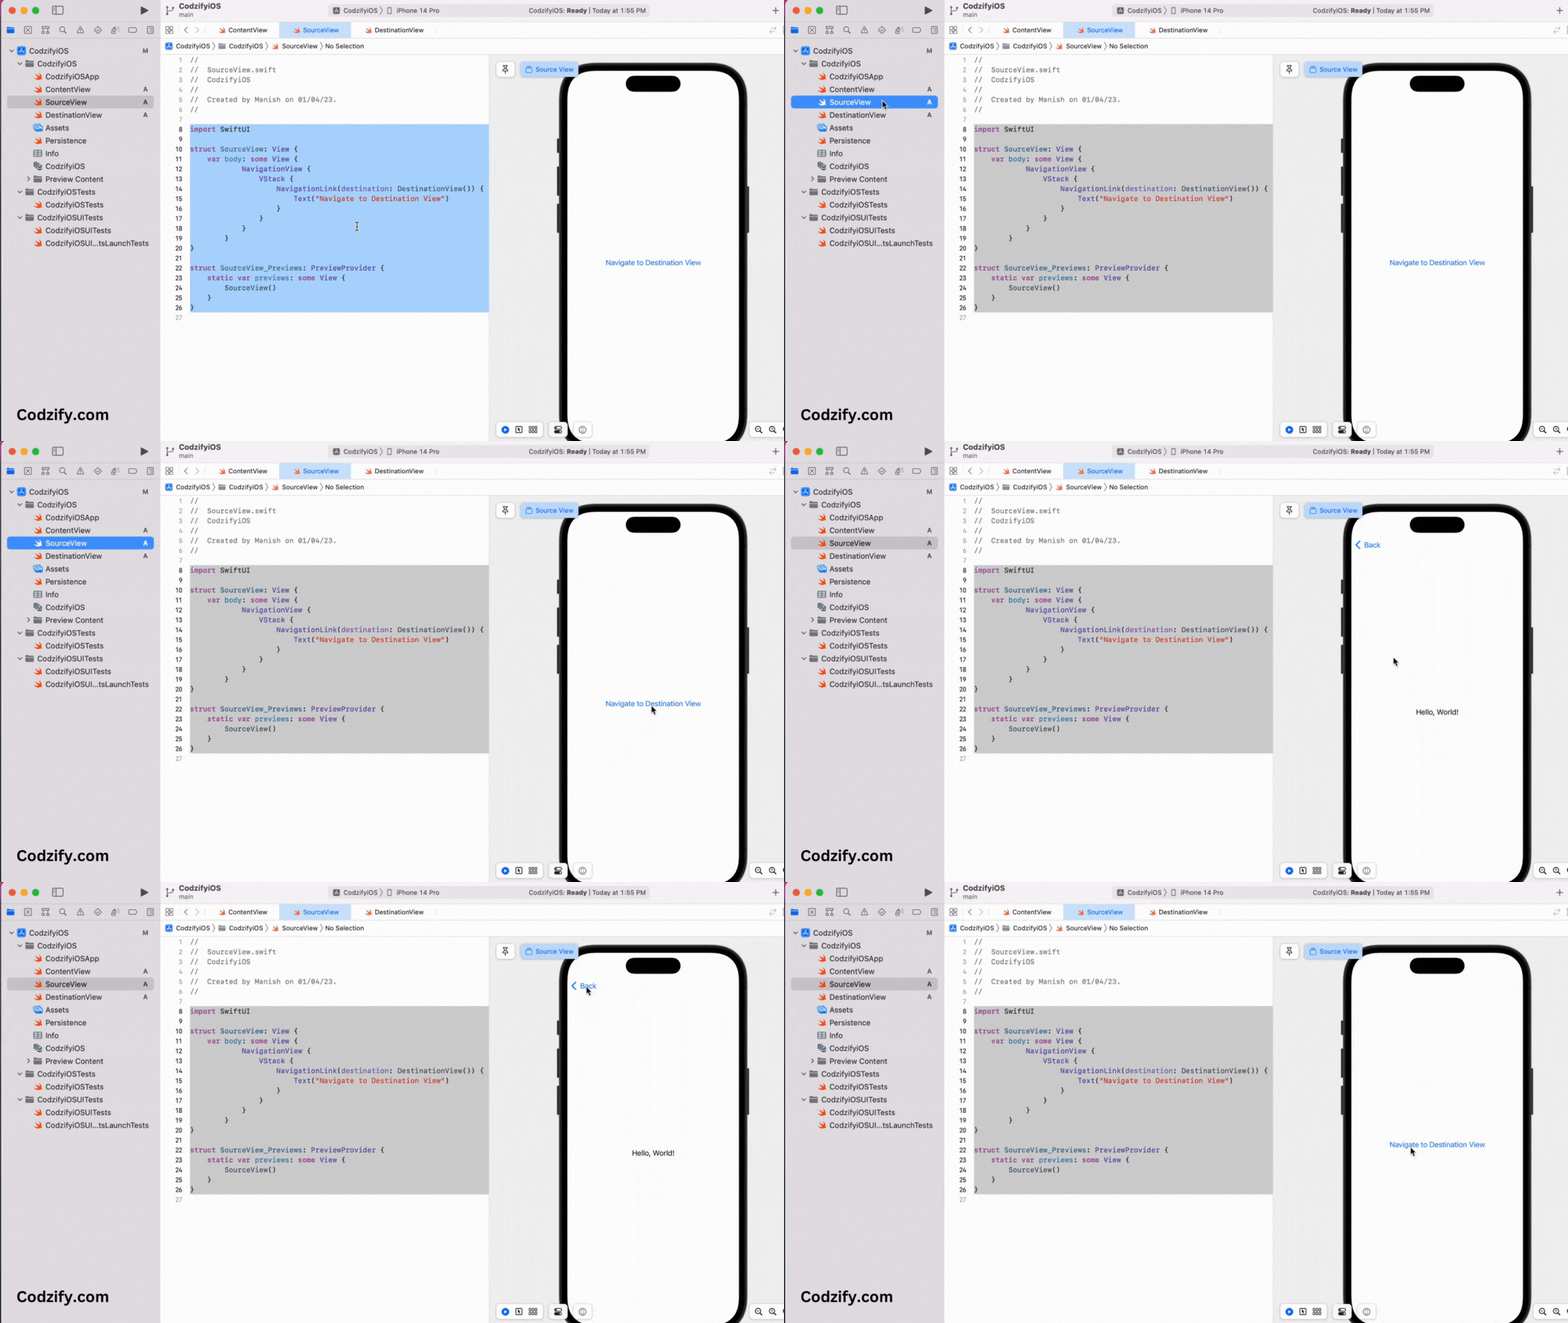
Final Output:

In this example, we're wrapping a Text view in a NavigationLink view, and specifying our DestinationView as the destination for the navigation.
3. Passing Data Between Views
In some cases, you may need to pass data between views during navigation. This can be done by creating a property in your destination view and passing the data as a parameter when triggering the navigation.
Here's an example of passing data between views:
Code Reference of SourceView
import SwiftUI

    struct SourceView: View {
        var body: some View {
                NavigationView {
                    VStack {
                        NavigationLink(destination: DestinationView(data: "Hello, World!")) {
                            Text("Navigate to Destination View")
                        }

                    }
                }
            }
    }

    struct SourceView_Previews: PreviewProvider {
        static var previews: some View {
            SourceView()
        }
    }
Code Reference of DestinationView
import SwiftUI

        struct DestinationView: View {
            var data: String
            var body: some View {
                Text("The data is: (data)")
            }
        }

        struct DestinationView_Previews: PreviewProvider {
            static var previews: some View {
                DestinationView(data: "")
            }
        }
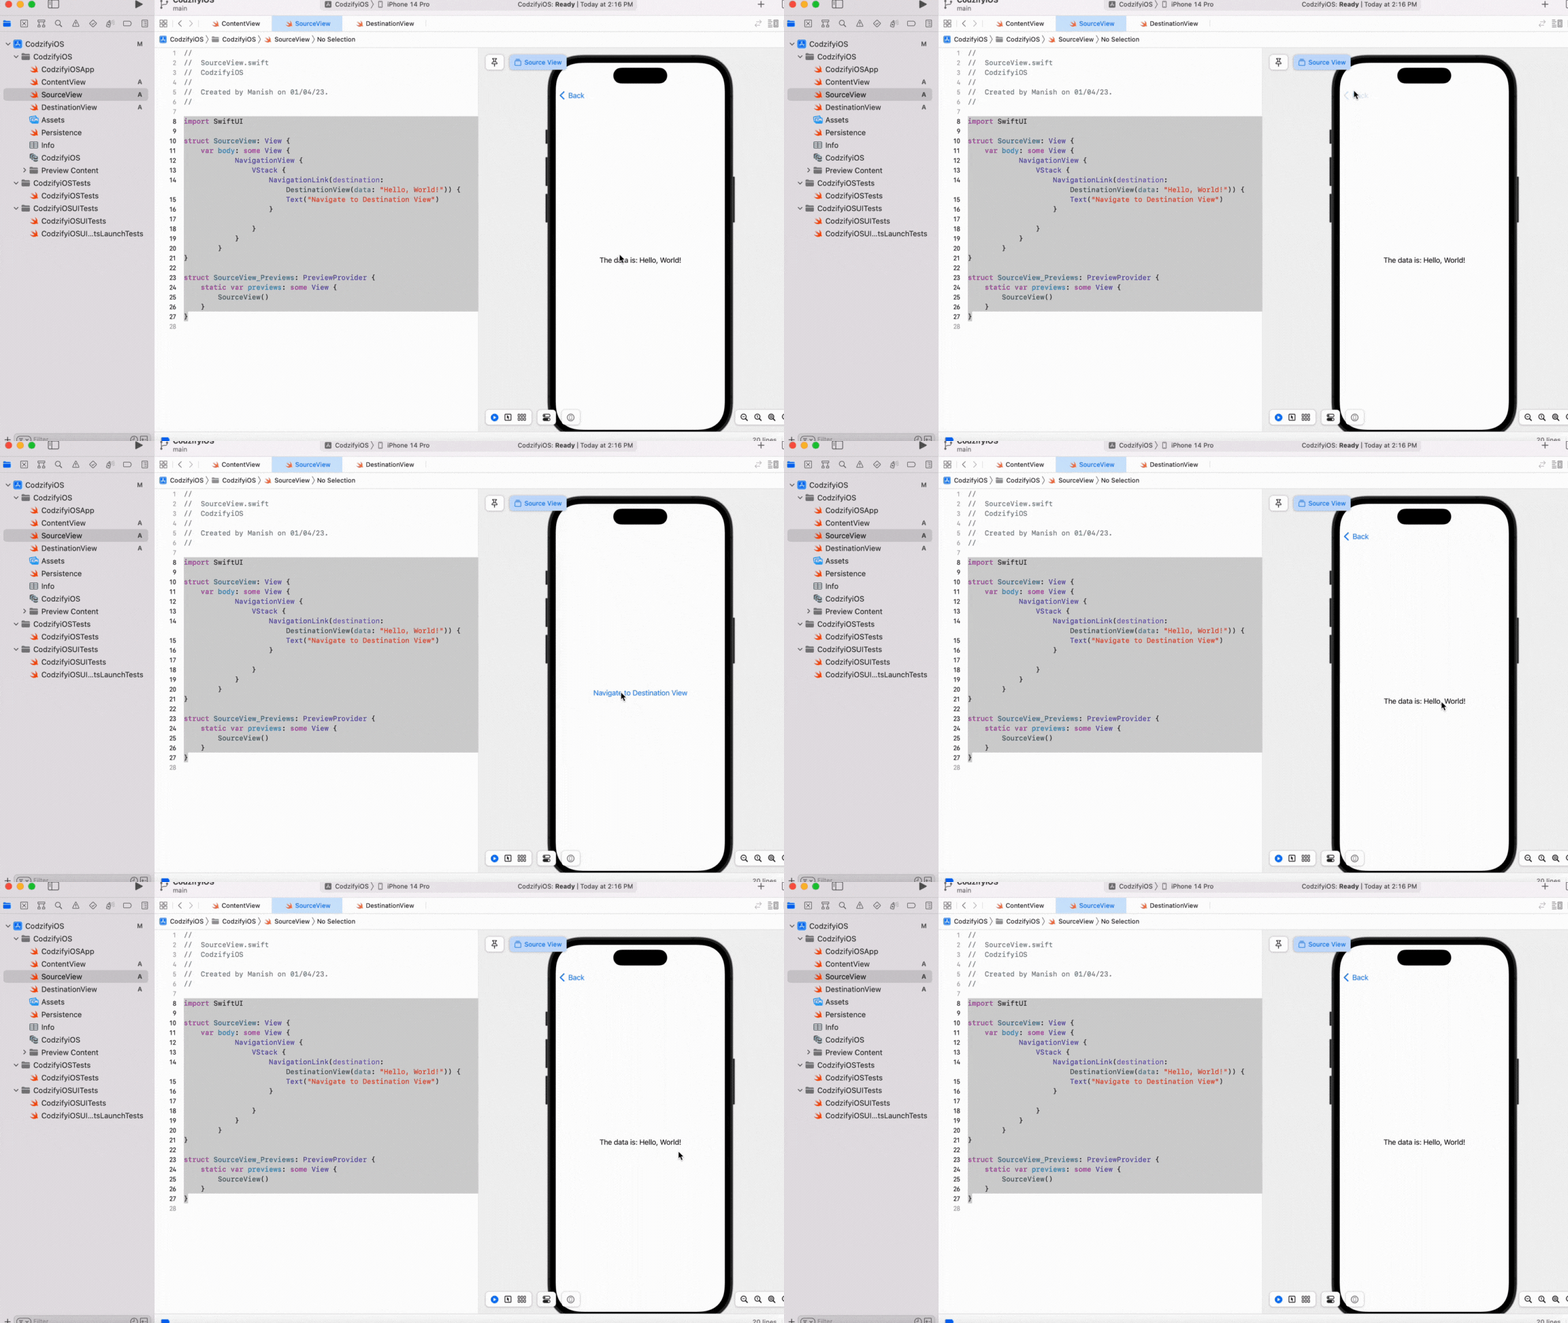
Final Output:

In this example, we're creating a data property in our DestinationView, and passing the string "Hello, World!" as a parameter when triggering the navigation.
Frequently Asked Questions
Q: Can I use a button to trigger navigation instead of a NavigationLink view?
A: Yes, you can use a button to trigger navigation by wrapping the button in a NavigationLink view.
Q: Can I customize the appearance of the navigation bar?
A: Yes, you can customize the appearance of the navigation bar by using the navigationBarTitle and navigationBarItems modifiers.
Q: Can I nest navigation views?
A: Yes, you can nest navigation views to create hierarchical navigation within your app.
By following these steps and practicing with different components, you can become proficient in navigating between views in SwiftUI. Good luck!
