How to create UILabel programmatically using Swift? | iOS Tutorial - Codzify Tutorials
Article by: Manish Methani
Last Updated: September 26, 2021 at 8:04am IST
In this article, we are going to discuss the following points
-
How to create UILabel programmatically using Swift?
-
Most common properties used to create the UILabel programmatically.
-
Start writing some code.
-
Explanation of Swift code written.
UILabel is used to display the static Contents. For Example, "Email", "Password" or anything. It can be a single-line label or even multiline though.
Most common properties used to create the UILabel programmtically
1) .text
2) .font
3) .numberOfLines
4) .lineBreakMode
5) .textColor
6) .backgroundColor
7) .textAlignment
Let's Start Creating UILabel programmtically
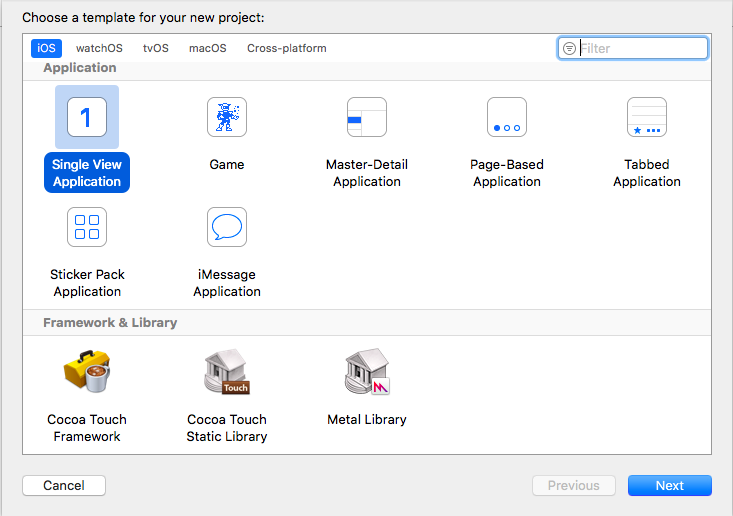
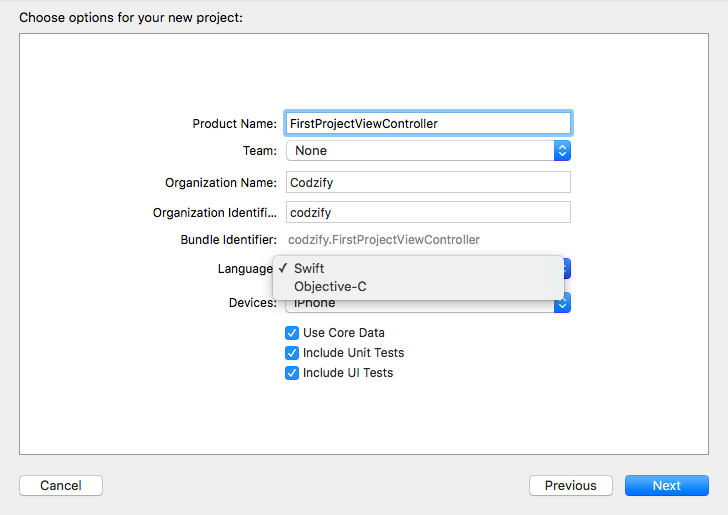
Open Xcode Goto File > New >Project >Single View Application > Enter Project Name (eg :- FirstProjectViewController) and Select Language as Swift > Done.


Now you can see a file on the left navigation Menu of Xcode named, ViewController.swift
Lets write some code
import UIKit
 var nameLabel = UILabel()
class ViewController: UIViewController {

    override func viewDidLoad()
     {
        super.viewDidLoad()

        self.view.backgroundColor = UIColor.init(red: 255.0/255.0, green: 255.0/255.0, blue: 255.0/255.0, alpha: 1.0)

        nameLabel = UILabel(frame:CGRect(x:12 , y:0 , width: self.view.frame.size.width - 12*2 , height: 40) )
        self.view.addSubview(nameLabel)
        nameLabel.textColor = UIColor.black
        nameLabel.text = "Thie is Label"
        nameLabel.font = UIFont .systemFont(ofSize: 18.0, weight: 1.0)
        nameLabel.textAlignment = NSTextAlignment.center
        nameLabel.layer.borderColor = UIColor.black.cgColor
        nameLabel.layer.borderWidth = 1.0
        nameLabel.numberOfLines = 0;
        nameLabel.lineBreakMode = NSLineBreakMode.byWordWrapping
     }
 }
The code given below is itself self-explanatory. We initialized a "nameLabel" at the beginning which is then added to self.view as a subView. After that, we assigned it some text and gave textColor with "UIColor" class and font with "UIFont" class.
numberOfLines is used to give how much content you want for the label to adjust. If you give it a 0 value that means there is no Limitation of content if assigned with line-breaking mode. Stick to the basics first here, which is how to initialize the frame for any UIElement, how to use its Properties like .text,.font, layer, etc to create UILabel programmatically.
.layer property
.layer property is used to give borderWidth, borderColor and cornerRadius. To give borderColor along with .layer property you have to give .cgColor at the end as you can see in the given example above.
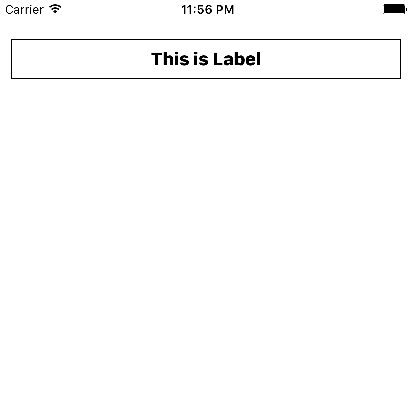
Output

