How to start building an App with only code using Autolayout in Swift iOS? - Codzify.com Tutorials
Article by: Manish Methani
Last Updated: October 2, 2021 at 10:04am IST
iOS 9 introduced NSLayoutAnchor with anchor properties on UIView. You can now set up your views to be �anchored� to other views.
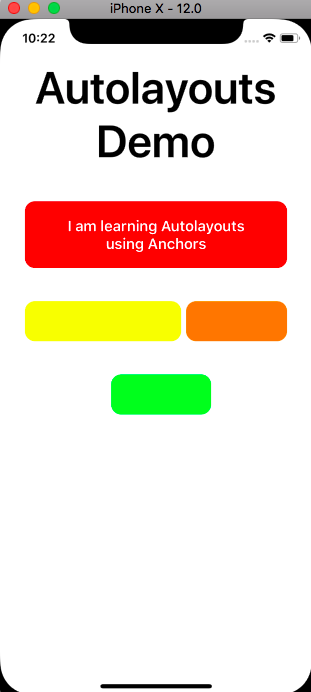
To understand the layout anchors practically, we will create a simple iOS App that displays four views as shown in the following figure,

Think Before Designing
To understand how to create this UI you must know a few things about Autolayout Anchors.
1) .leftAnchor is used to give spacing from the left side.
2) .rightAnchor is used to give spacing from the right side.
3) .topAnchor is used to give spacing from the topside.
4) .bottomAnchor is used to give spacing from the bottom side.
5) .heightAnchor is used to give height.
6) .widthAnchor is used to give width.
7) .centerXAnchor is used to align the view on Center X-Axis.
8) .centerYAnchor is used to align the view on Center Y-Axis.
Let's Code
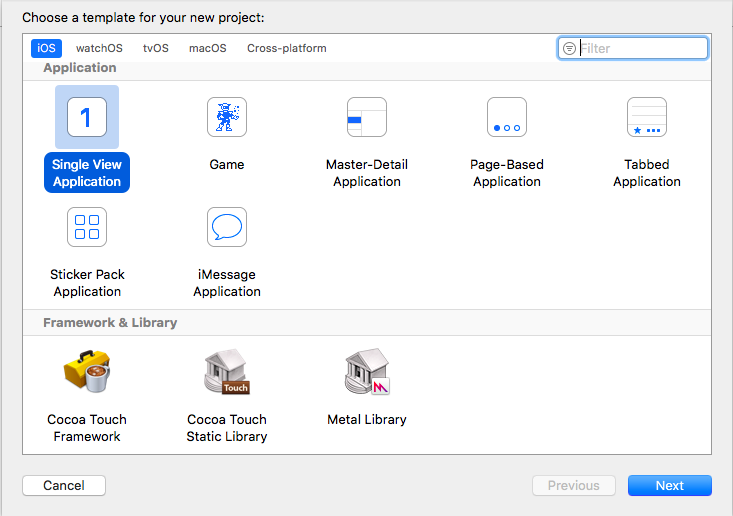
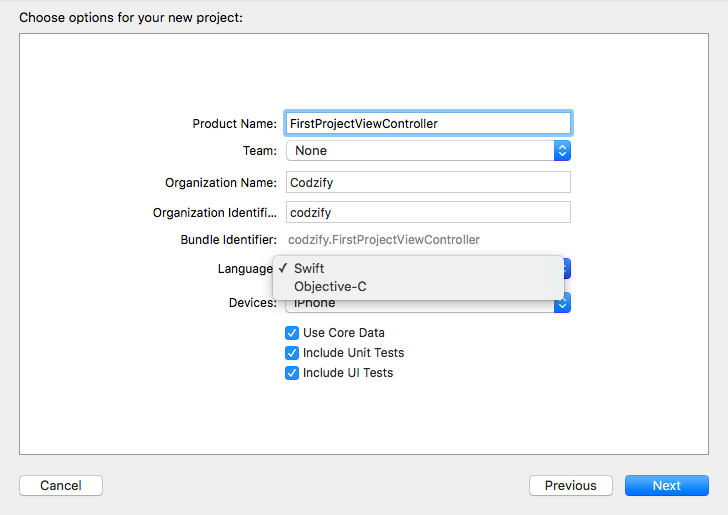
Open Xcode Goto File > New > Project > Single View Application > Enter Project Name (eg :- FirstProjectViewController) and Select Language as Swift > Done. Open ViewController.swift file,


Let's begin with the header title label with the text "Autolayouts Demo". Inside viewDidLoad method,
let labelHeaderTitle = UILabel()
self.view.addSubview(labelHeaderTitle)

labelHeaderTitle.translatesAutoresizingMaskIntoConstraints = false

NSLayoutConstraint.activate([
      labelHeaderTitle.centerXAnchor.constraint(equalTo: self.view.centerXAnchor, constant: 0),
      labelHeaderTitle.rightAnchor.constraint(equalTo: self.view.rightAnchor, constant: CGFloat(-PADDING)),
      labelHeaderTitle.topAnchor.constraint(equalTo: self.view.topAnchor, constant: 50),
            ])
labelHeaderTitle.textColor = UIColor.white
labelHeaderTitle.text = "Autolayouts Demo"
labelHeaderTitle.font = UIFont.boldSystemFont(ofSize: 54)
labelHeaderTitle.textColor = UIColor.black
labelHeaderTitle.numberOfLines = 0
labelHeaderTitle.lineBreakMode = .byWordWrapping
labelHeaderTitle.textAlignment = .center
Here, the first line indicates the reference variable for UILabel which we use to assign various properties of the label.
Then the label is added to self.view which you can also call as a superview of the label. The label here is a subview of self.view
translatesAutoresizingMaskIntoConstraints is set to false which basically used to tell the view that it�s using Auto Layout rather than frames.
Then, we applied anchors which set the label at center X of view, 6px from top of self.view, 6px from the right of self.view Right Anchors always takes negative values.
Then we applied some properties to label for better UI experience
RedView
If you understand this hierarchy of how to create a red view, then you can create any UI in Autolayouts programmatically. Here
RedView is leftAnchor at 6px from self.view
RedView heightAnchor is set to 80
RedView rightAnchor is at -6px from right side.
TopAnchor
I read top anchors with relative views like this, you may also follow the same approach. Redview topAnchor is a bottomAnchor of Header title.
 // Red View
        let redView = UIView()
        self.view.addSubview(redView)
        redView.translatesAutoresizingMaskIntoConstraints = false
        NSLayoutConstraint.activate([
         redView.leftAnchor.constraint(equalTo: self.view.leftAnchor, constant: CGFloat(PADDING*5)),
         redView.topAnchor.constraint(equalTo: labelHeaderTitle.bottomAnchor, constant: 40.0),
         redView.heightAnchor.constraint(equalToConstant: 80),
         redView.rightAnchor.constraint(equalTo: self.view.rightAnchor, constant: CGFloat(-PADDING*5))
        ])
        redView.backgroundColor = UIColor.red
        redView.layer.cornerRadius = 12.0
Final Code
import UIKit

class ViewController: UIViewController {

    var PADDING = 6.0
    override func viewDidLoad() {
        super.viewDidLoad()

        // Header Title
        let labelHeaderTitle = UILabel()
        self.view.addSubview(labelHeaderTitle)
        labelHeaderTitle.translatesAutoresizingMaskIntoConstraints = false
        NSLayoutConstraint.activate([
            labelHeaderTitle.centerXAnchor.constraint(equalTo: self.view.centerXAnchor, constant: 0),
            labelHeaderTitle.rightAnchor.constraint(equalTo: self.view.rightAnchor, constant: CGFloat(-PADDING)),
            labelHeaderTitle.topAnchor.constraint(equalTo: self.view.topAnchor, constant: 50),
            ])
        labelHeaderTitle.textColor = UIColor.white
        labelHeaderTitle.text = "Autolayouts Demo"
        labelHeaderTitle.font = UIFont.boldSystemFont(ofSize: 54)
        labelHeaderTitle.textColor = UIColor.black
        labelHeaderTitle.numberOfLines = 0
        labelHeaderTitle.lineBreakMode = .byWordWrapping
        labelHeaderTitle.textAlignment = .center

        // Red View
        let redView = UIView()
        self.view.addSubview(redView)
        redView.translatesAutoresizingMaskIntoConstraints = false
        NSLayoutConstraint.activate([
         redView.leftAnchor.constraint(equalTo: self.view.leftAnchor, constant: CGFloat(PADDING*5)),
         redView.topAnchor.constraint(equalTo: labelHeaderTitle.bottomAnchor, constant: 40.0),
         redView.heightAnchor.constraint(equalToConstant: 80),
         redView.rightAnchor.constraint(equalTo: self.view.rightAnchor, constant: CGFloat(-PADDING*5))
        ])
        redView.backgroundColor = UIColor.red
        redView.layer.cornerRadius = 12.0

        // Label Inside Red View
        let labelInsideRedView = UILabel()
        redView.addSubview(labelInsideRedView)
        labelInsideRedView.translatesAutoresizingMaskIntoConstraints = false
        NSLayoutConstraint.activate([
        labelInsideRedView.leftAnchor.constraint(equalTo: redView.leftAnchor, constant: CGFloat(PADDING*2)),
        labelInsideRedView.rightAnchor.constraint(equalTo: redView.rightAnchor, constant: CGFloat(-PADDING*2)),
        labelInsideRedView.centerYAnchor.constraint(equalTo: redView.centerYAnchor),
            ])
        labelInsideRedView.textColor = UIColor.white
        labelInsideRedView.text = "I am learning Autolayouts using Anchors"
        labelInsideRedView.font = UIFont.boldSystemFont(ofSize: 18.0)
        labelInsideRedView.numberOfLines = 0
        labelInsideRedView.lineBreakMode = .byWordWrapping
        labelInsideRedView.textAlignment = .center


        // Yellow View
        let yellowView = UIView()
        self.view.addSubview(yellowView)
        yellowView.translatesAutoresizingMaskIntoConstraints = false
        NSLayoutConstraint.activate([
            yellowView.leftAnchor.constraint(equalTo: self.view.leftAnchor, constant: CGFloat(PADDING*5)),
            yellowView.topAnchor.constraint(equalTo: redView.bottomAnchor, constant: 40.0),
            yellowView.heightAnchor.constraint(equalToConstant: 48),
            yellowView.widthAnchor.constraint(equalToConstant: self.view.frame.size.width/2.0)
            ])
        yellowView.backgroundColor = UIColor.yellow
        yellowView.layer.cornerRadius = 12.0


        // Orange View
        let orangeView = UIView()
        self.view.addSubview(orangeView)
        orangeView.translatesAutoresizingMaskIntoConstraints = false
        NSLayoutConstraint.activate([
            orangeView.leftAnchor.constraint(equalTo: yellowView.rightAnchor, constant: CGFloat(PADDING)),
            orangeView.topAnchor.constraint(equalTo: redView.bottomAnchor, constant: 40.0),
            orangeView.heightAnchor.constraint(equalToConstant: 48),
            orangeView.rightAnchor.constraint(equalTo: self.view.rightAnchor, constant: CGFloat(-PADDING*5))
            ])
        orangeView.backgroundColor = UIColor.orange
        orangeView.layer.cornerRadius = 12.0


        // Green View
        let greenView = UIView()
        self.view.addSubview(greenView)
        greenView.translatesAutoresizingMaskIntoConstraints = false
        NSLayoutConstraint.activate([
            greenView.centerXAnchor.constraint(equalTo: self.view.centerXAnchor, constant: CGFloat(PADDING)),
            greenView.topAnchor.constraint(equalTo: orangeView.bottomAnchor, constant: 40.0),
            greenView.heightAnchor.constraint(equalToConstant: 48),
            greenView.widthAnchor.constraint(equalToConstant: 120)

            ])
        greenView.backgroundColor = UIColor.green
        greenView.layer.cornerRadius = 12.0

    }
}
You can create an yellowView like you created an redView. Now, what would be an leftAnchor of orangeView? OrnageView's leftAnchor would be a rightAnchor of yellowView. Right? topAnchor of OrangeView would be bottomAnchor of redView.
I aimed to let you understand how to create UI using Autolayouts programmatically. I hope, you got the concept of Autolayouts in this introduction article. We will create many things in Autolayout, so do not worry about things now. Just understand the code and read the theory again to clear the concept of Anchors. Tada!!!

