How to create tableview in iOS programmatically swift ? - Codzify.com Tutorials
Article by: Manish Methani
Last Updated: September 25, 2021 at 2:04pm IST
UITableView is used to display the list of contents. The best example to assume UITableView is "Contacts List in WhatsApp." Yes, the list of contacts we all see in the WhatsApp App is created using UITableView.

How cells are created using Reusable Fashion?
UITableView consists of the number of rows in vertical view and each row is called a cell. Each cell is created in a reusable Fashion.
Suppose you want to create a list of 1000 contacts in your app using UITableView. Then instead of creating a thousand rows each time " UITableView" provides a way to reuse the existing rows so that the rows which are visible on the screen are created and when you scroll the UITableView same rows will be used again instead of new row creation.
Most commonly used Delegates and DataSource Methods
These are the most commonly used delegates and data source methods,
func tableView(_ tableView: UITableView, numberOfRowsInSection section: Int) -> Int ;

func numberOfSectionsInTableView(tableView: UITableView) -> Int

func tableView(_ tableView: UITableView, cellForRowAt indexPath: IndexPath) -> UITableViewCell {

func tableView(tableView: UITableView, viewForHeaderInSection section: Int) -> UIView?

func tableView(_ tableView: UITableView, heightForHeaderInSection section: Int) -> CGFloat {

func tableView(_ tableView: UITableView, heightForRowAt indexPath: IndexPath) -> CGFloat


//more methods which are used with UITableView Reference object.
.reloadData();

.reloadRows(at: [indexPath], with: .top)
UITableView Example
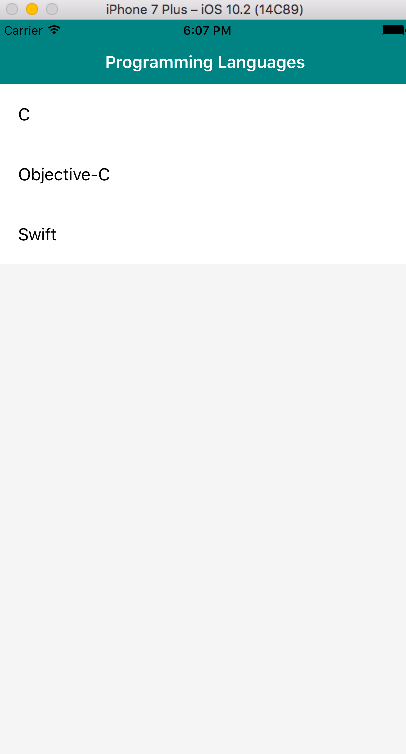
This example explains to you to understand the basics of UITableView. Here, we will create a Codzify App that shows the list of titles of tutorials on the codzify.com website.
Final Output:
Let's start creating UITableView
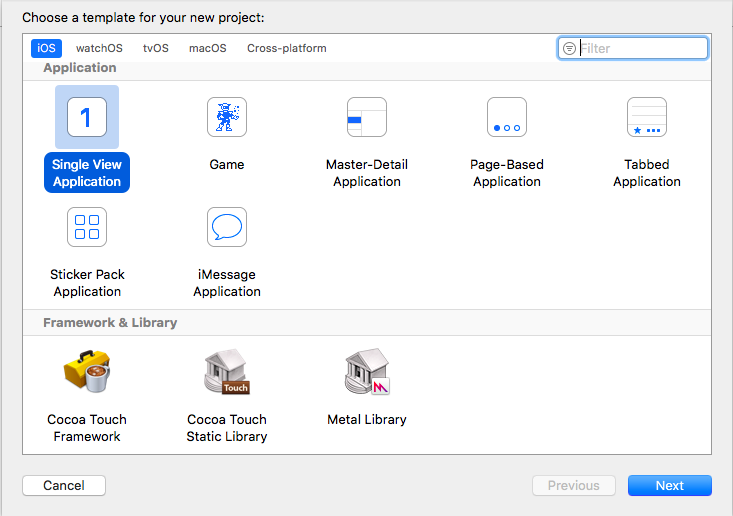
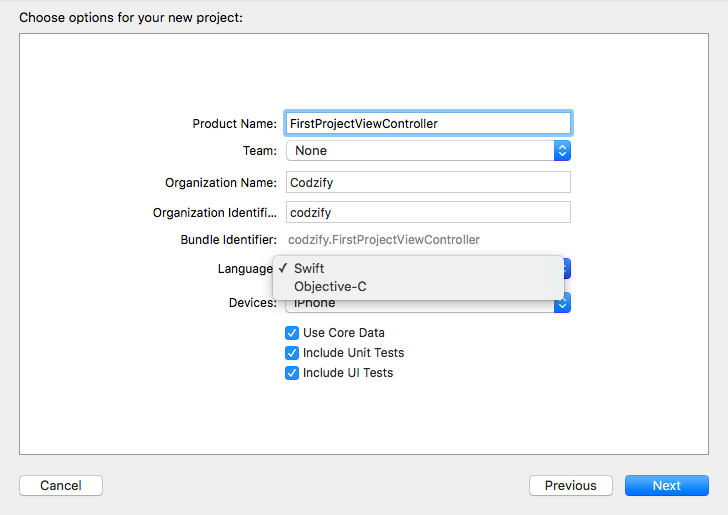
Open Xcode Goto File > New >Project >Single View Application > Enter Project Name (eg :- FirstProjectViewController) and Select Language as Swift> Done.
Now you can see a file on the left navigation menu of Xcode named, ViewController.swift
We start first with AppDelegate.swift File. Copy and paste this code in the didFinishLaunchingWithOptions method (the very first method you can see in Appdelegate. swift).
import UIKit
import CoreData

@UIApplicationMain
class AppDelegate: UIResponder, UIApplicationDelegate {

    var window: UIWindow?

    func application(_ application: UIApplication, didFinishLaunchingWithOptions launchOptions: [UIApplicationLaunchOptionsKey: Any]?) -> Bool {
        // Override point for customization after application launch.

        window = UIWindow(frame: UIScreen.main.bounds)
        let mainController = ViewController() as UIViewController
        let navigationController = UINavigationController(rootViewController: mainController)
        navigationController.navigationBar.isTranslucent = false
        self.window?.rootViewController = navigationController
        self.window?.makeKeyAndVisible()

        return true
    }
AppDelegate is the file that is called first when your App Starts. There are many ViewControllers added to your file. So How our App knows which one to start first? So in didFinishLaunchingApplications, we told our code to begin with the ViewController file.
UINavigationController is mostly what you see in every App. This is a header with teal color as you see in the Final Output Image. Word itself tells its mean. It Controls all the navigation.
self.window?.rootViewController = navigationController
In this way, you can set the Root View Controller. In our case we want ViewController.swift file to be the first one to start.
ViewController.swift file looks like this:
import UIKit


class ViewController: UIViewController, UITableViewDelegate, UITableViewDataSource {

    private let myArray: NSMutableArray = ["C","Objective-C","Swift"]
    private var myTableView: UITableView!

    override func viewDidLoad() {
        super.viewDidLoad()

        self.view.backgroundColor = UIColor.init(red: 245/255.0, green: 245/255.0, blue: 245/255.0, alpha: 1.0);

        self.navigationItem.title = "Programming Languages"

        self.navigationController?.navigationBar.barTintColor = UIColor.init(red: 0/255.0, green: 128/255.0, blue: 128/255.0, alpha: 1.0)
        self.navigationController?.navigationBar.titleTextAttributes = [NSForegroundColorAttributeName: UIColor.white]
        self.navigationController?.navigationBar.tintColor = UIColor.white


        myTableView = UITableView(frame: CGRect(x: 0, y: 0, width: UIScreen.main.bounds.size.width, height: self.view.frame.height - 60))
        myTableView.register(UITableViewCell.self, forCellReuseIdentifier: "cell")
        myTableView.dataSource = self
        myTableView.delegate = self
        myTableView.backgroundColor = UIColor.clear
        myTableView.separatorStyle = UITableViewCellSeparatorStyle.none
        self.view.addSubview(myTableView)

    }


    func numberOfSectionsInTableView(tableView: UITableView) -> Int {
        return 0 // you should probably return 1
    }

    func tableView(_ tableView: UITableView, numberOfRowsInSection section: Int) -> Int {
        return myArray.count
    }


    func tableView(_ tableView: UITableView, didSelectRowAt indexPath: IndexPath) {
        print("Num: (indexPath.row)")
        print("Value: (myArray[indexPath.row])")

    }


    func tableView(_ tableView: UITableView, cellForRowAt indexPath: IndexPath) -> UITableViewCell
     {
       let cell = tableView.dequeueReusableCell(withIdentifier: "cell", for: indexPath as IndexPath)

       cell.textLabel!.text = "(myArray[indexPath.row])"

       return cell
    }

 func tableView(_ tableView: UITableView, heightForRowAt indexPath: IndexPath) -> CGFloat
    {
        return 60
    }
}
A short description of an Example:
We had given a backgroundColor to NavigationBar, Added a Programming Languages title, and given a White text Color to the Title.
Here, viewDidLoad() method is called first. In this method, we initialized a UITableView.
myTableView = UITableView(frame: CGRect(x: 0, y: 0, width: UIScreen.main.bounds.size.width, height: self.view.frame.height - 60))
Then, we registered a data source and delegate methods of TableView. We have to register these methods to implement its delegate methods.
 myTableView.dataSource = self
myTableView.delegate = self
Then you have to register the forCellReuseIdentifier and give it the same name which you use in the cellForRowAtIndexPath method of UITableView.
myTableView.register(UITableViewCell.self, forCellReuseIdentifier: "cell")
The last line adds tableViewTutorialsTitle as a subView inside view.
self.view.addSubview(myTableView)
In numberOfRowsInSection we are going to use the count of elements in our NSMutableArray to tell the tableView how many rows to create:
 func tableView(_ tableView: UITableView, numberOfRowsInSection section: Int) -> Int {
        return myArray.count
  }
 func tableView(_ tableView: UITableView, cellForRowAt indexPath: IndexPath) -> UITableViewCell {
       let cell = tableView.dequeueReusableCell(withIdentifier: "cell", for: indexPath as IndexPath)
                cell.textLabel!.text = "(myArray[indexPath.row])"

        return cell
    }
func tableView(_ tableView: UITableView, heightForRowAt indexPath: IndexPath) -> CGFloat
This method is used to set the height of a row.